Buying and growing carnivorous plants in India

There are very few sellers of carnivorous plants in India, which is why I am attempting to grow my inventory and sell as many species as I can. I operate from my home and grow the plants in my balcony, so stocks are unlikely to be in vast quantities to rival regular nurseries. However, given the rarity of these plants in India, I still think it is a worthwhile effort to make them available to hobbyists.

This post attempts to address common questions asked by new carnivorous plant growers.

Why are the plants so small?

Many of the species of carnivorous plants are quite small. It is their relative rarity and difficulty in growing that is the reason for the cost and not their size. Most droseras for example will only be a in inch to a few inches big. Pygmy droseras are even smaller. Notable exceptions are drosera binata forms.

Other plants can grow to massive sizes, but take a long time getting there and it is more affordable to buy seedlings and grow them with patience. Nepenthes species, most notably are among these. A nepenthes seedling can take upwards of two years to start forming adult pitchers. Apart from a few relatively common species of Nepenthes that are propagated from cuttings, an adult plant can be the result of years of investment in skill, growing conditions and risks with die offs. Such a plant will run into the tens of thousands if from among the more rare and spectacular species or hybrids. Depending on the rarity of the species, a plant that is only a few inches big can cost thousands of rupees. So, in such cases, the plants are small due to reasons of affordability and practicality.

What should I buy – seeds or plants?

If you are a beginner, your best bet is to buy live plants. Carnivorous plant seeds can be really minute and difficult to germinate and grow without some experience, even with seeds that are viable. Also, viability of carnivorous plant seeds can drop rapidly after being harvested (my seeds are always fresh). It is easy to be discouraged when seeds don’t germinate.

Notable exceptions to this are species that don’t handle root disturbance well – particularly the long leaved ones of these – byblis species, drosophyllum, long leaved droseras like drosera indica species come to mind. If you can buy these in person, without requiring them to be shipped, they are definitely the better option. However, if shipping is involved, you may be better off buying seeds.

If you buy seeds on the internet, please be sure to buy from a reliable seller. Avoid listings on Ebay that are from China (though sometimes now they appear to be from other countries). You can recognize them easily from the use of words like “bonsai” “pcs per bag” “blue temptress” and so on. They will also be ridiculously cheap. These are always fake. No amount of reporting appears to work to get the sellers banned, but these seeds will always be bogus.

A way to identify a good seller is to check out their other sales. If they are selling all kinds of plants and seeds (think tomatoes, cucumbers and roses next to rare nepenthes species), know that they are likely resellers knowingly or unknowingly but likely selling bogus seeds. However, if the person has only a couple of listings and they are all carnivorous plants or other rare plants, chances are good that the seller is legit. Another way to know is from reading the listing and seeing the photos. If the photos don’t match a simple google search for what the species looks like, the listing is a fake. A seller selling authentic seeds is more likely to have photos that appear to be taken in “real” conditions, without photoshop effects and the listing can often have more information about the plant.

Another alternative is to buy from online nurseries specifically selling carnivorous plants. Seeds from here are often likely to be genuine. Be warned though that even among these, sites that sell 10 seeds and so on of nepenthes are often reselling seeds purchased in bulk from other sellers or collectors from the wild and there is no way to know the viability of these seeds. Reliable sellers will often publish harvesting dates for seeds. Or at least the year and season they were harvested in.

How to buy carnivorous plants online

Know that there are very few sellers in India and very few sellers abroad that will ship to India. Additionally, if you are a beginner, you’d be well advised to buy from established sellers in India. The downside to this is that the plants are often without accurate species identification or they are among really common varieites. This cannot be avoided. Most sellers in India have limited collections and we tend to sell only spares, obviously. But this is the best option if you are a beginner wanting a cool plant rather than a specific species.

The reason for this is that shipping within India takes less time and the plants suffer less shock. These varieties being relatively common, the plants you get will be larger and less expensive. More importantly, these plants are acclimatized to the relatively hot conditions in most of India.

I would not be exaggerating when I say I have spent lakhs of rupees on plants that died. Most sellers abroad who ship to India are in really cold countries to the point they have to shop selling in winters because of extreme cold temperatures. The plants suffer stress from long shipping times as well as major temperature shock. It was years before I learned to research for plants that would survive our climate, good times of the year to order them in (where our temperatures are relatively low but it isn’t cold enough to prevent shipping in seller’s country). Sadly, the best times also coincide with Indian festivals, resulting in shipping delays.

And then to protect the plants and to keep them alive and thriving after arrival. I learned this the hard way, but in my opinion, beginners should not attempt this at all, unless you have money to throw away. It is much better to gain experience in growing them and keeping them alive with less expensive and more common plants that are available in India that won’t suffer too much climate shock.

The plant I purchased has lost leaves/pitchers or is otherwise wilting

Many plants suffer shipping shock. This is an excellent reason to try and buy plants in person rather than having them shipped. However, given that local nurseries don’t exactly stock carnivorous plants, sometimes shipping is inevitable. Most sellers will replace plants that arrive dead, at least once (though there are some who won’t – even when bad packing is the cause of plant death). For this, you should click photos of the plant immediately on unpacking and contact the seller. You are unlikely to get replacements for simple wilting or some damage to leaves/pitchers if the plant is otherwise healthy.

However, once you have received a live plant, you are on your own. If you kill it, it is dead and you won’t have a replacement.

Depending on whether you have received the plant bare rooted or in a pot, you may need to pot it up in a suitable potting mix. Your seller can advise you on this. (Any plants I sell on this site already have the information in the product listing). I would advise against repotting a plant you receive already potted, unless the potting mix looks really suspect. There is no need to add transplant shock to shipping shock. It will increase the risk to the survival of your plant. If you need to plant it to a bigger pot, take out the entire rootball from the smaller pot it arrived in, and plant it in the larger one without disturbing the roots. If the seller grew the plant in that potting mix to the point he has plants to sell, including this exact plant, the plant is unlikely to suffer any damage from being in the pot it arrived in.

Once your plant is in a suitable pot, I would recommend putting the whole thing in a plastic bag to retain humidity and keeping in a shady place (not dark!) that doesn’t get any direct sunlight. The only exception to this is if you already have a misting system or humidifier or it is a heavy monsoon and the plants are getting regular spray from the rain. In that case, the misting/humidity as well as the air circulation is even better. Keep them like this till you see the first signs of growth – usually in the unfurling or growing of the newest leaves at the top.

This can take a while, so if you are potting up multiple plants, it may be wise to give each a separate container and plastic bag, so you can acclimatize each as per its own speed. If you have several plants in one container/bag, go according to the speed of the slowest one. Remaining protected for longer won’t harm the ones that are adjusting well, but being exposed to harsher conditions will kill those that aren’t.

After this, you may slowly decrease the humidity by poking holes in the plastic bag, or opening it very slightly every few days, till the plant seems to get very little protection from the bag and remove the bag. The longer you can take for this process, the better the chances of survival for your plant.

It is normal to lose old leaves and pitchers on a plant after shipping. Expect this. It is not a crisis and nor is it a threat to your plant unless all the leaves seem to be dying. New leaves and pitchers formed in your growing conditions will remain for much longer.

How to protect from pests

Best protection from pests is growing healthy plants. However, pests are a fact of growing plants. Some plants are more susceptible than others. Neem oil should be the first line of defense. It is harmless to most carnivorous plants. You can also use a strong spray of water to dislodge pests physically. immersing the container in a tub of water can help get rid of some pests in the potting mix, though a complete repotting may be needed in heavy infestations.

Some fungus in potting mix can be harmless, particularly if the plants seem fine otherwise. Good air circulation and light prevents damping off and other problems. Avoiding excessively soggy mix and making sure that the pots drain well also helps keep plants healthy.

There are stronger pesticides and fungicides that can be used in worse infestations. However, I am not listing them here, as they can be species specific and what works brilliantly on your nepenthes may wipe out your entire drosera collection, so these should not be used without extensive research.


I will add to this post as I can think of other things to add. I am also happy to discuss carnivorous plants with any hobbyist, particularly from India (no purchases needed). You may contact on Twitter @Vidyut for general discussion or email [email protected] for anything specific.

Growlist drosera

Here are the species from the drosera genus that I am currently growing:

I’ll be adding photos here as well as creating more individual descriptive pages as I get time.

drosera species

  1. drosera magnifica
  2. drosera indica
  3. drosera alicae aka drosera curviscapa
  4. drosera binata dichotoma giant
  5. drosera binata multifida
  6. drosera burmanii
  7. drosera peltata
  8. drosera andromeda
  9. drosera adelae
  10. drosera prolifera
  11. drosera filiformis
  12. drosera magnifica
  13. drosera regia (probably dead/dormant)
  14. drosera capensis red
  15. drosera capensis white
  16. drosera capensis broad leaf
  17. drosera capensis random
  18. drosera spatulata
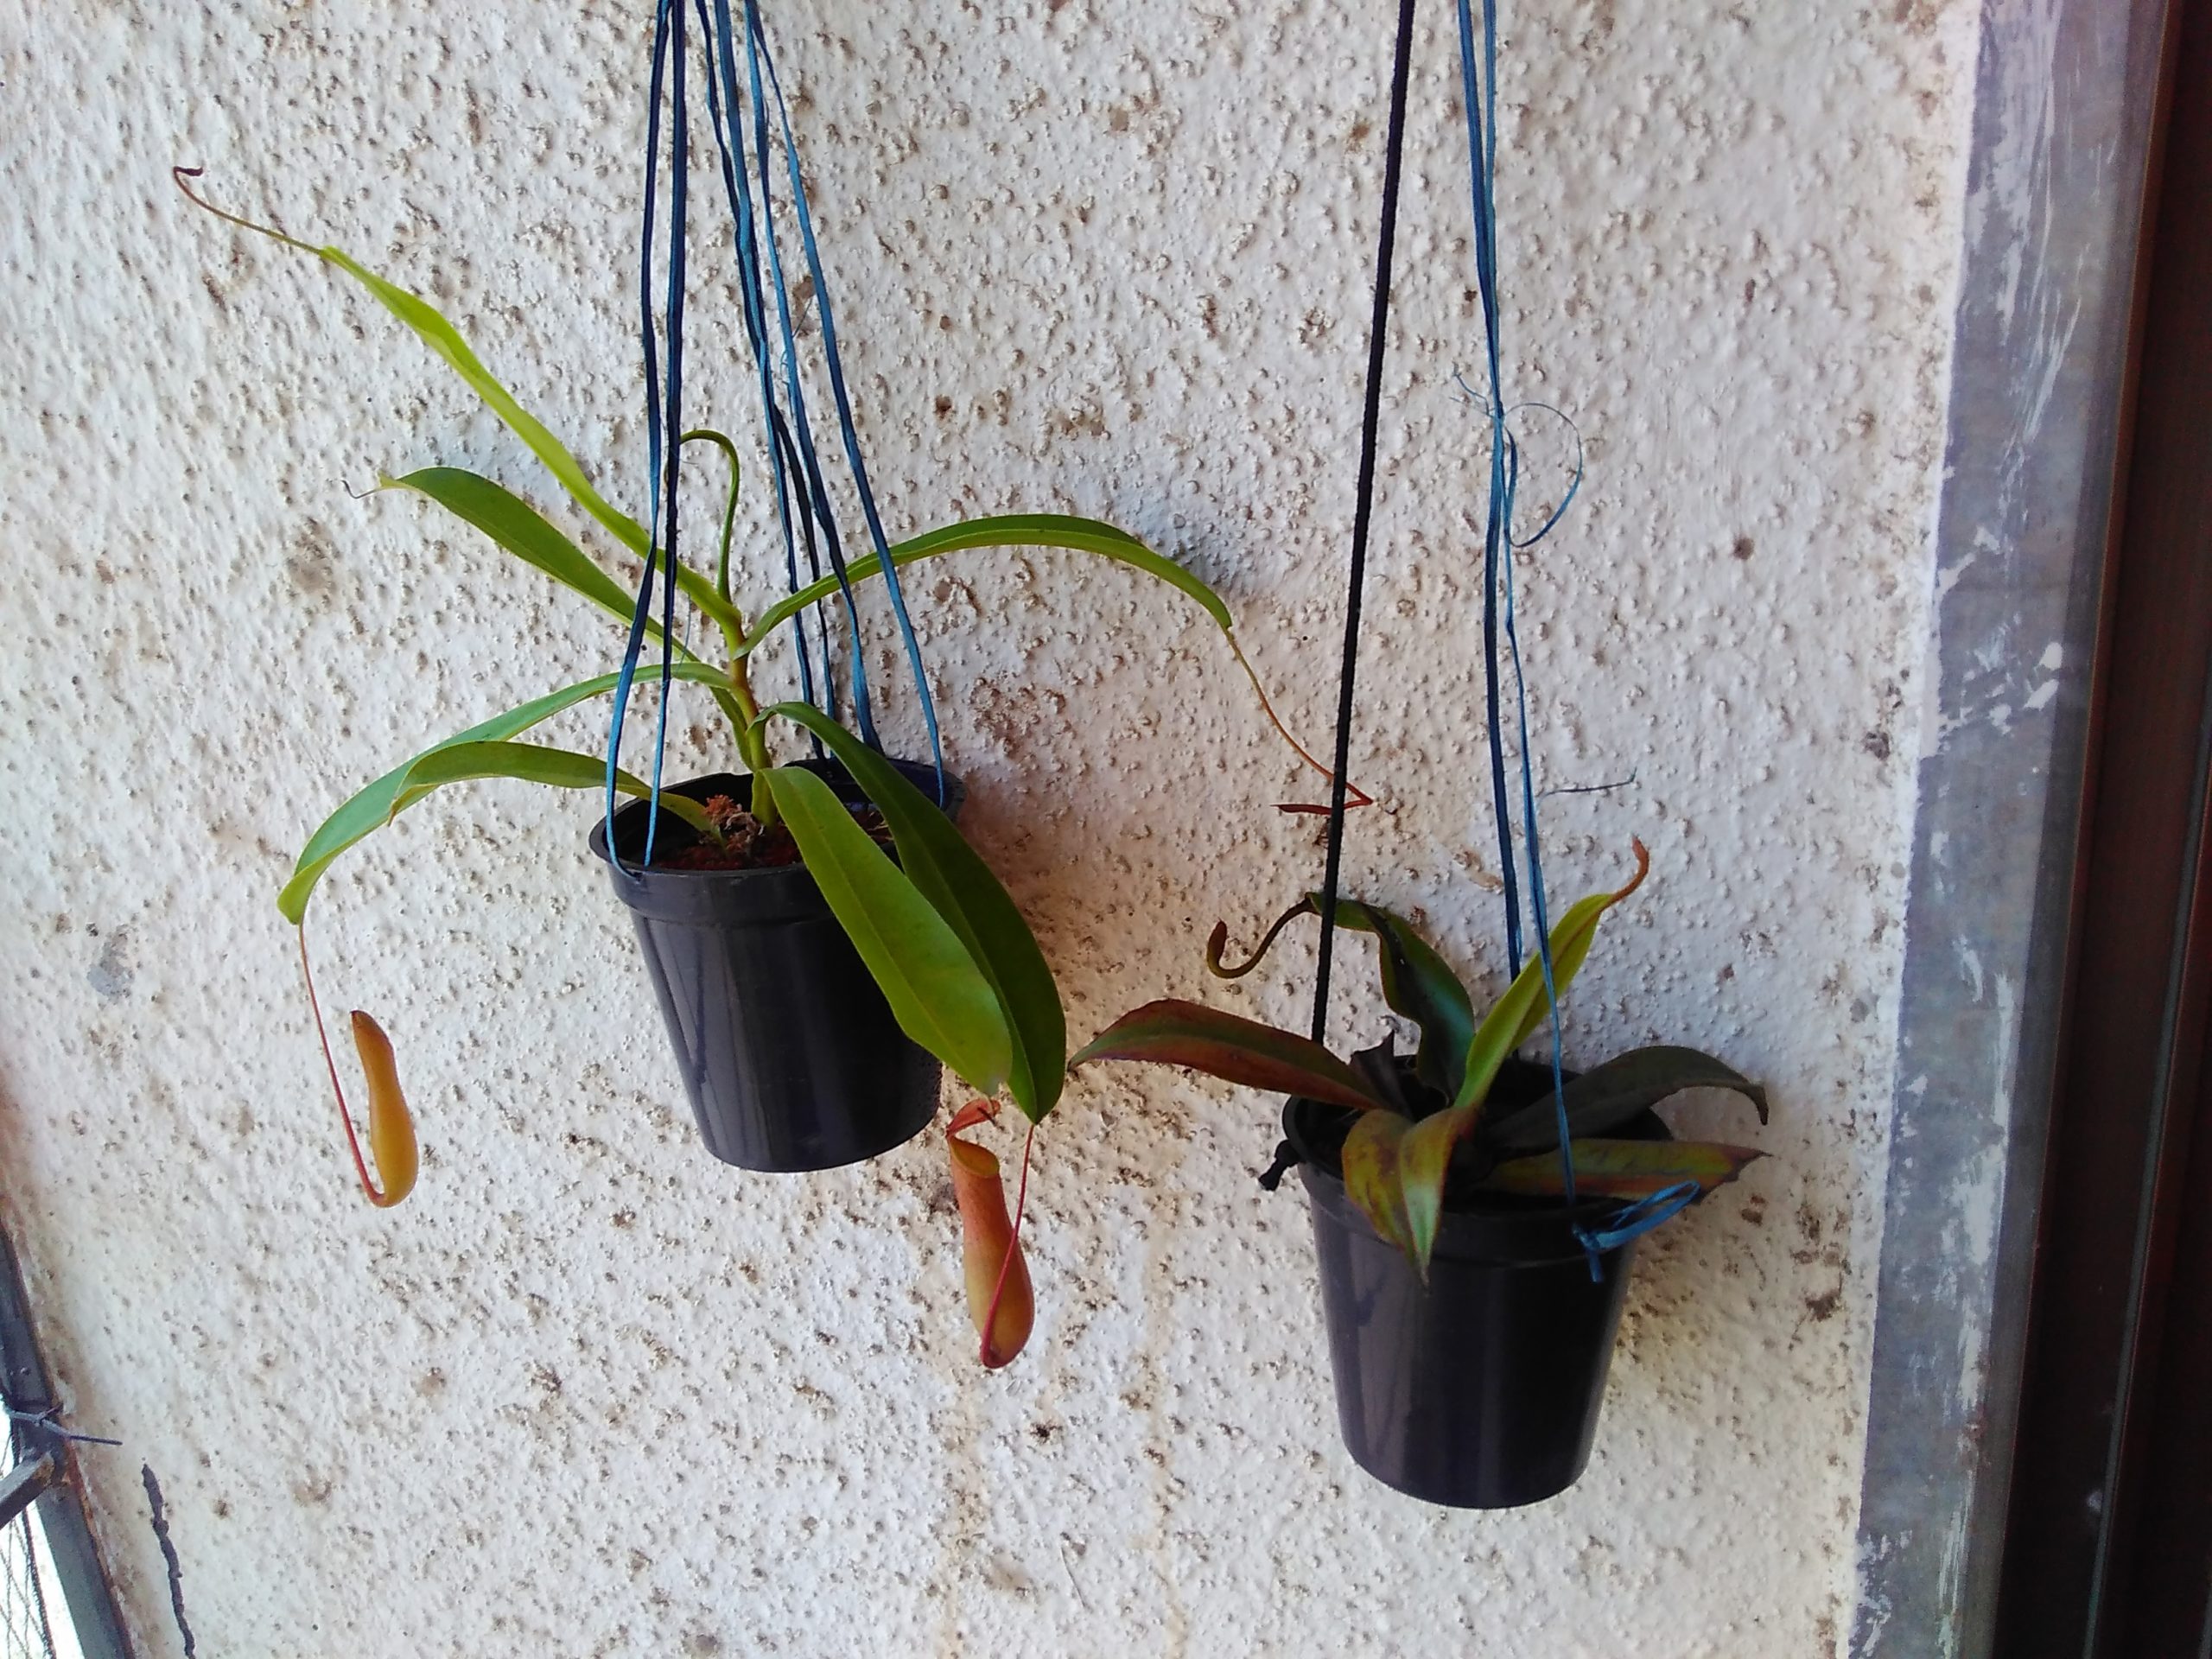
Nepenthes Ventrata and Nepenthes Mirabilis pitcher plants hanging in shady spot to rest after travel

Growlist: Nepenthes genus species and hybrids

Most of the nepenthes plants I have are small, under 3 years old. Nepenthes can grow really, really slowly till they hit a certain critical size. Here is an almost comprehensive list of all the nepenthes I am growing. Apart from these, I have several other seeds sown, but not yet germinated and some unidentified plants.

I’ll be adding photos here as well as creating more individual descriptive pages as I get time.

Here are the species from the nepenthes genus that I am currently growing:

Nepenthes genus

Nepenthes species

  1. Nepenthes sumatrana
  2. Nepenthes ampullaria
  3. Nepenthes mirabilis green
  4. Nepenthes mirabilis red
  5. Nepenthes rafflesiana
  6. Nepenthes vietchii
  7. Nepenthes robcantleyi
  8. Nepenthes truncata
  9. Nepenthes thoreilli
  10. Nepenthes bicalcarata
  11. Nepenthes reinwardtiana
  12. Nepenthes benstonei
  13. Nepenthes burkei
  14. Nepenthes glabrata
  15. Nepenthes northiana
  16. Nepenthes bellii

Seedlings of nepenthes nepenthes mirabilis var echinostoma, nepenthes maxima, nepenthes ampullaria red, nepenthes veitchii, nepenthes maxima – giant wavy, nepenthes rafflesiana, nepenthes rafflesiana var alata

Seeds not yet germinated: Nepenthes smilesii, nepenthes hispida, nepenthes bongso, nepenthes merrilliana, nepenthes hemsleyana, nepenthes northiana, nepenthes maxima (sulawesi), nepenthes bongso

Nepenthes hybrids

  1. Nepenthes x ventrata
  2. Nepenthes rajah x veitchii
  3. Nepenthes mirabilis var globosa x hamata
  4. Nepenthes maxima x vogeilli
  5. Nepenthes densiflora x robcantleyi
  6. Nepenthes vietchii x platychila
  7. Nepenthes robcantleyi x veitchii
  8. Nepenthes mirabilis var globosa x ampullaria
  9. Nepenthes alata x mirabilis var globosa
  10. Nepenthes rafflesiana x ampullaria
  11. Nepenthes rafflesiana x ampullaria {west of Jale, Johor, Malaysia}
  12. Nepenthes alata x ampullaria

Transposh translation filter and Yoast sitemaps compatibility

Transposh Translation Filter is a seldom updated, but very useful plugin for running multilanguage sites on WordPress. It is free, it is very intuitive to use and so far, does not appear to slow the site down too much. You can find the plugin here. Due to some differences with WordPress, the version on WordPress is outdated and no longer updated.

While the plugin creates translated page versions, the sitemaps created by the very popular Yoast SEO plugin (earlier known as WordPress SEO) don’t include those pages. The plugin documentation provides a patch that needs to be applied to the Yoast SEO plugin in the class-sitemaps.php file as follows.

/**
* This function integrates with yoast sitemap generator, and adds for each viewable language, the rest of the languages url
* Also - priority is reduced by 0.2
* And this requires the following patch in class-sitemaps.php
* For future yoast versions, and reference, look for this function:
if ( ! in_array( $url['loc'], $stackedurls ) ) {
// Use this filter to adjust the entry before it gets added to the sitemap
$url = apply_filters( 'wpseo_sitemap_entry', $url, 'post', $p );
if ( is_array( $url ) && $url !== array() ) {
$output .= $this->sitemap_url( $url );
$stackedurls[] = $url['loc'];
}
}

And change to:

if ( ! in_array( $url['loc'], $stackedurls ) ) {
// Use this filter to adjust the entry before it gets added to the sitemap
$url = apply_filters( 'wpseo_sitemap_entry', $url, 'post', $p );
if ( is_array( $url ) && $url !== array() ) {
$output .= $this->sitemap_url( $url );
$stackedurls[] = $url['loc'];
}
$langurls = apply_filters( 'wpseo_sitemap_language',$url);
if ( is_array( $langurls )) {
foreach ($langurls as $langurl) {
$output .= $this->sitemap_url( $langurl );
}
}
}
-------------------------------------------------------------------------
* @param yoast_url array $yoast_url Object containing the page information

However, on examining the code of the current version of the Yoast SEO plugin, I found that this function no longer exists at that location. With some experimentation, I found that the file inc/sitemaps/class-post-type-sitemap-provider.php needs to be edited to include the Transposh function. Find this part:

/**
* Filter URL entry before it gets added to the sitemap.
*
* @param array  $url  Array of URL parts.
* @param string $type URL type.
* @param object $post Data object for the URL.
*/
$url = apply_filters( 'wpseo_sitemap_entry', $url, 'post', $post );

if ( empty( $url ) ) {
continue;
}

if ( $post->ID === $this->get_page_for_posts_id() || $post->ID === $this->get_page_on_front_id() ) {

array_unshift( $links, $url );
continue;
}
$links[] = $url;
}

unset( $post, $url );
}

return $links;
}

And change it to

				/**
* Filter URL entry before it gets added to the sitemap.
*
* @param array  $url  Array of URL parts.
* @param string $type URL type.
* @param object $post Data object for the URL.
*/
$url = apply_filters( 'wpseo_sitemap_entry', $url, 'post', $post );

if ( empty( $url ) ) {
continue;
}

if ( $post->ID === $this->get_page_for_posts_id() || $post->ID === $this->get_page_on_front_id() ) {

array_unshift( $links, $url );
continue;
}
$links[] = $url;

/** Transposh Fix */
$langurls = apply_filters( 'wpseo_sitemap_language',$url);
if ( is_array( $langurls )) {
foreach ($langurls as $langurl) {
$links[] = $langurl;
continue;
}
}
/** End Transposh fix */
}

unset( $post, $url );
}

return $links;
}

Hope you find this useful.

Acclimatizing tissue culture droseras

I just got some tissue cultures of drosera in the mail and planted them out. Given how little information there is on the internet on safely acclimatizing droseras and given how many plants I have killed till I stopped killing them, thought it may help people if I wrote the steps I took. Sadly, being alone at home and not able to find the tripod for my phone, I was not able to video the process or take pictures while I was working.

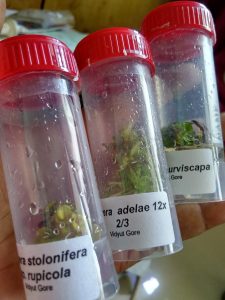
The plants arrive in plastic vials containing small plants in sterile tissue culture growing on agar based media. The vials are air tight and your race to acclimatize the plants basically starts the minute you crack one open and pathogens can enter the vial and rapidly multiply on the sugars in the growing media. The minute you have done this, the plants can no longer survive in that medium without being at severe risk of fungal infections in particular and must immediately be moved out to growing conditions or new tissue culture.

To transition the plants safely to growing conditions, it is important to ensure that they get intermediate conditions that allow them to adapt in a gradual manner. Here are my tips/learnings from several experiences of acclimatizing tissue culture plants to my conditions.

Growing conditions of plants in tissue culture

  • In tissue culture, the plants have a nutrient dense medium to grow on that allows them all the energy they need to grow rapidly.
  • This nutirent dense medium is indiscriminate – fungus can grow on it with as much joy as a plant (and kill the plant) if you allow it to be contaminated. Therefore, the tissue culture is sterile. The plants have no need to build defenses against normal microbial threats prevalent in the world, because they don’t need to face them while in the tissue culture.
  • The plants are growing in 100% humidity. As a result, the plants don’t need to develop any protection against losing moisture.
  • The plants are usually growing in much less light than normal growing conditions and in any case, they will have arrived after spending several days in complete darkness if they have been shipped to you.
  • The plants often have very few to no roots at all, because the growing media provides nutrition so effectively, the plant has no need to develop a root system while growing in the culture.

Precautions that need to be taken when acclimatizing delicate carnivorous plants from tissue culture

  • Acclimatize plants to increased light
  • Acclimatize plants to lower humidity
  • Acclimatize plants to normal microbial ecosystem in growing area
  • Encourage the plant to develop roots

Steps I take to ensure successful acclimatization of tissue cultured plants to growing medium before deflasking

  • Unless the culture seems to be infected in any way or the plants are in any immediate risk of damage from being left in the tissue culture, I prefer to wait for a week to remove the plants from the sterile flasks. In this week, I leave the plants undisturbed in normal growing area temperature and low light – never direct light – not even bright light. Just giving them a chance to recover from the travel and darkness to some light. I may increase the light they get gradually if opportunity presents, but I don’t stress about it – one week is a relatively short time for any major adaptations. If the plants are doing fine in the flask and growing, I’d probably leave them there for another week or two.
  • Try to deflask at a time when the temperatures are relatively “normal” and you aren’t getting any extreme highs and such (in our area, no question of low temperatures, but I suppose watch out for that too, if your area is prone to cold weather)
  • Mix the growing medium and keep pots ready before deflasking the plants.
  • Maintain a relatively pathogen free growing space. I don’t actually sterilize the growing media before planting the drosera onto it, but I do try to ensure that the growing medium is well rinsed and fresh and the pots are either new, or cleaned thoroughly to prevent fungal or insect infestations from whatever grew in it previously.
  • Keep plenty of distilled or RO water handy for rinsing. You will regret if you run short in the middle of the process. Also keep tools you may beed clean and handy. For me, these would be tweezers and a spoon or two. I also like to have a few clean bowls handy if I want to use them.

My deflasking process for tissue culture droseras

  • As soon as the flask is open, the race against time starts on various fronts. My main objective is to reduce shock (can’t be prevented, altogether, of course), prevent dehydration and prevent contamination.
  • I keep two bowls of water handy. I open the flask and drop the plants into one bowl of water. If the plants are growing well in the medium, this may take slight encouragement to dislodge/scoop them from the agar using the handle of a spoon.
  • Rinse the plants as best as possible without getting brutal about it. The goal is to get any of the agar medium that may be on the plants off. This is one stage I am never really certain of, given that the agar is transparent in water, so it is hard to make out if you have got it all off. Swirling the plants in the water a bit helps.
  • I pick individual plants and check them for remaining agar medium as best as I can before putting them in the second bowl of clean water. I have found that adding a touch of fungicide to this water gives me better results, but I have had plants grow successfully without the fungicide too. Trichoderma viride works too, though I have heard that some droseras don’t like it. I haven’t had problems so far. I suppose you could play safe and use sulphur or Mancozeb or something.
  • This is also the time I separate plants that may have got tangled with each other. I do as little of this as possible, and only for plants that are tangled with roots facing in the opposite directions, so that if I planted them as they were, one root would be in the media and the other in the air – those must be gently pulled apart. For plants tangled with roots facing in the same direction, I don’t bother to separate them, unless they fall apart on their own while swirling in the water or handling. This is because i want to keep the mechanical damage to the plants to a minimum – the goal at this stage is not to have as many individual plants as possible, but to get as much of the living plant matter to survive the transition. I can always separate those that survive later if need be when they are well acclimatized and growing robustly.
  • I never ever break apart plants growing as a clump. This happens quite often with tissue culture plants, where several plants grow out of a “blob” of plant matter base (callus, it is called properly, I think), often with few or no roots between the whole blob. If the plants are connected at the base, I don’t break them apart, I treat them all as one plant.
  • This whole thing takes longer to type than do. Put them in the water, swish them around, separate what separates readily, move to clean water.
  • The plants can rest here for a bit in the water, if there is anything you need to prepare for the next steps. The water will prevent them dehydrating.

Planting newly deflasked tissue culture droseras

  • Growing medium for the unflasked tissue culture droseras should be whatever you use for normally growing your droseras.
  • Before you touch the plants floating in the water, make sure you have something to cover the pots with as soon as the plants are planted. Putting them into a plastic bag, as I have done works. Putting a transparent cup on top of the pot works too. Whatever you choose to give the plants 100% humidity after planting should be ready to deploy as soon as the plants are planted into the medium – I can’t stress this enough.
  • This is not the time to toughen them up. They are used to 100% humidity. Give them 100% humidity – I have found this to have direct impact on survival rates – though strangely I haven’t read too much stress on this on the internet. Probably because a lot of the instructions are for tougher plants – orchids, bananas and so on. Drosera are way more fragile, I think. Minimizing potential for dehydration in the deflasking and planting process is important.
  • Keep them in water till the point of being planted. Cover them immediately after planting. Yes, this means covering each pot up as it is ready instead of waiting to cover all after all the planting is done. At least I have done it like this on the times I have had better success.
  • Sometimes, when planting the blobs, it is hard to make out what to plant and what to keep out, because the plants may not be formed well enough to make sense of as “this is root, plant this in media”. For plants like this, I make a shallow depression and put the whole base into it and sort of nestle the growing media some way up around the plant. So it gives the base media to root into, and also sort of cups the plant lovingly in case it wants to root from other places.
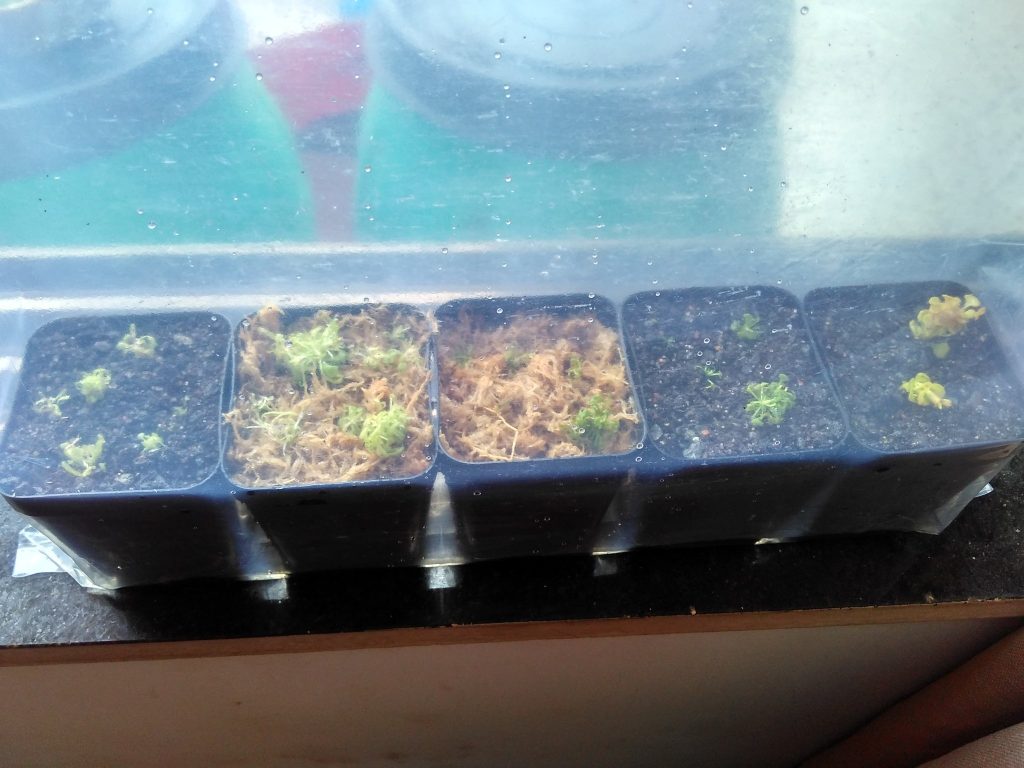
  • When done, put the plants in a place where they get moderate light – not too bright and definitely not direct. Make sure they have water – whether in the plastic bag you put pots into – as I have done in this case below – or whether standing in trays. This can’t be stressed enough. If the pots dry out, your plants are history.
  • Click a photo of how your plants look at this stage. You will see why later.
  • Now for the acclimatization.

Acclimatization of tissue culture plants in growing media

If you did everything right, at this point, you will have plants planted into moist growing media, full humidity and low to moderate light. If you look back to the week of letting them sit and recover from travel, you will notice that their conditions now have changed growing medium and a lack of sterile conditions, but other conditions remain what they are used to – low light and 100% humidity. So in essence, we are breaking down all the things they will have to adapt into small, doable chunks.

Keep them like this. They should be able to grow like this indefinitely if need be. There is no hurry. Hurry before the plants are ready will kill them. This is a good time to remember that the most destructive pest in a garden can be an eager novice gardener. Leave them alone to do their thing. Don’t even look at them if it will tempt you to touch. For a week at least, no matter what the plants do, short of getting an infection and dying, ignore it. Some may wilt. Leaves may die on occasion. Resist the temptation to interfere and do something to save – it will only add to the shock. There isn’t much you can do at this point apart from ensuring they have humidity and some light but not overwhelming. Remove any plants that die, of course. But if you did things right so far, and began with a healthy culture and removed most of the agar, there shouldn’t be any dead.

After two weeks, you can begin thinking about acclimatizing them to the other things they need to adapt to. This is the riskiest part of the process.

  • I like to follow an individualized process instead of putting all the plants through the same acclimatization regardless of their condition.
  • I examine all the pots and compare with the photo I took when I planted them out. What I am looking for is signs that the plant is well adapted so far, before adding to their stress.
  • Signs I look out for include new growth and dew formation on leaves. The new growth is self explanatory. It means the plant is adapted from the stress and back to its main business of growing. In well adapted plants, this growth can seem dramatic. From the ragged clumps of green that get planted, you have miniature plants glistening with dew. This also usually indicates root development. These guys are ready. The rest get more time to wait and get there.
  • There is no hurry. If some plants in a pot seem to have adapted, while the others are still struggling, it is a good idea to wait till they are all doing better, because of course what steps you take will happen with all the plants in one pot, unless you potted each plant up separately – which I rarely do for lack of space.
  • With plants that are well acclimatized, this is a good time to take off or open whatever you have been doing for humidity and take a moment to admire your plants. Maybe a few photos. Then close it back up and let it be. Do this a couple of times over the next few days. What you are doing is letting the humidity drop for a bit before returning it to 100%
  • You can do the same with light. Move them to brighter light – particularly when they are open – bright light encourages dew formation, and helps the plant not lose dew outside the humidity cover. Avoid direct sunlight too soon, but once the plants are open several times a day without suffering, it should be fine to expose them to early morning or late evening direct light.
  • After a few days of opening them briefly, you can open them up for a while carefully and away from direct drying breezes like a fan. You can leave them open for say half an hour or so before returning the humidity. You can mist them a bit on occasion if needed to delay covering them up. Don’t overdo it. Misting is not watering.
  • Once you have your plants in the open for over half an hour several times a day, you can try feeding them with very small insects to boost speed of growth. Be very careful while doing this. High humidity encourages mold
  • Then I change tactics and leave a small opening in the bag or if using a glass/dome, I lift it up a bit from one side. And leave it like that after leaving the plant open for a while. The humidity will be high, but not 100% – there will be some ventilation. Other ways to reduce humidity can be poking holes in the cover or leaving the cover open from the top while still protecting from breezes from the sides.
  • If at any point the plants look like they are wilting or they lose their dew, increase humidity a bit.
  • Basically, you then increase this exposure to low humidity slowly till they are finally in open pots and growing normally.

This is a time consuming phase. I have done it over a month and still lost plants to shock. This time I’m planning to take two months.

I have found that I start feeling ambitious as the plants do better and tend to skip precautions and make drastic changes thinking the plants can take the shock. Invariably I am wrong and end up losing plants. A plant doing better means they are adapting well to the conditions I have already given them – not the conditions I will be giving them. This means that small steps are working. Not that large steps will work. This is important to remember, because if you are like me, you want the plants to be growing normally already and want to interpret all observations to mean that they can handle more and more. I cannot overstate the importance of understanding that this is a stressful adaptation for a plant and a plant doing well is definitely a call for celebration, but not a call for increasing stress on it.

Just like a school child scoring well in exams doesn’t mean they should be made to study 24/7.

This time, I am hoping to not lose any plants at all. I am planning to give the plants an extra few days when I see them thriving before adding a new stress.


No longer selling soaps or carnivorous plants because of GST

Update: The government has now allowed online sellers the same exemption from having to register for GST as regular sellers. So I am once more selling soaps and carnivorous plants.


This blog is basically about the stuff I am up to at home. When I make artistic soaps because I enjoy making them, I sell the surplus, because there is only so much bathing one can do. When I grow plants (mostly carnivorous, but some others too), I sell those I grow in excess and seeds so that people interested in these hard to find plants can obtain them and grow them themselves. I’ve spent far more than I’ve earned on both h0bbies, but the purpose of doing them was never to do big business. Could I expand if I wanted to? Sure. But I am a loner, thinker at heart. Spending my day selling stuff is not a vision I hold for myself.

vertical garden varieties

Here are three different ways I’m growing vertically on just one wall of my balcony

The little money I did get was spent right back on obtaining more obscure plants. Usually from abroad, because the irony of carnivorous plants growing in India is that even as their habitats die, unlike in other countries, enthusiastic citizens have not taken up growing them in private collections. So today, if you want to buy a drosera indica or its seeds, you end up buying from abroad – a plant that natively grows in India and is, in fact named such. There are a few carnivorous plant sellers. All of them online. There simply isn’t enough of a market nationwide for individual sellers to chalk up say…. 20 lakhs in sales a year. Let alone profit.

There are maybe a dozen sellers in the country – 4-5 that I know of. Perhaps a few hundred enthusiasts to buy from them. Maybe a few thousand. Nationwide. I would be surprised if any of the businesses chalk up stunning profits. This is a hobby of lovers. The sales may make minor profits for those who invest space and money, but for the large part in a country where agriculture itself is a loss making proposition, the possibility of obscure carnivorous plants raking in the moolah is remote. Most of us hobbyists, delling as individuals wouldn’t even need to register a business unless there was a proper nursery involved. Certainly not the likes of me, growing plants in my balcony.

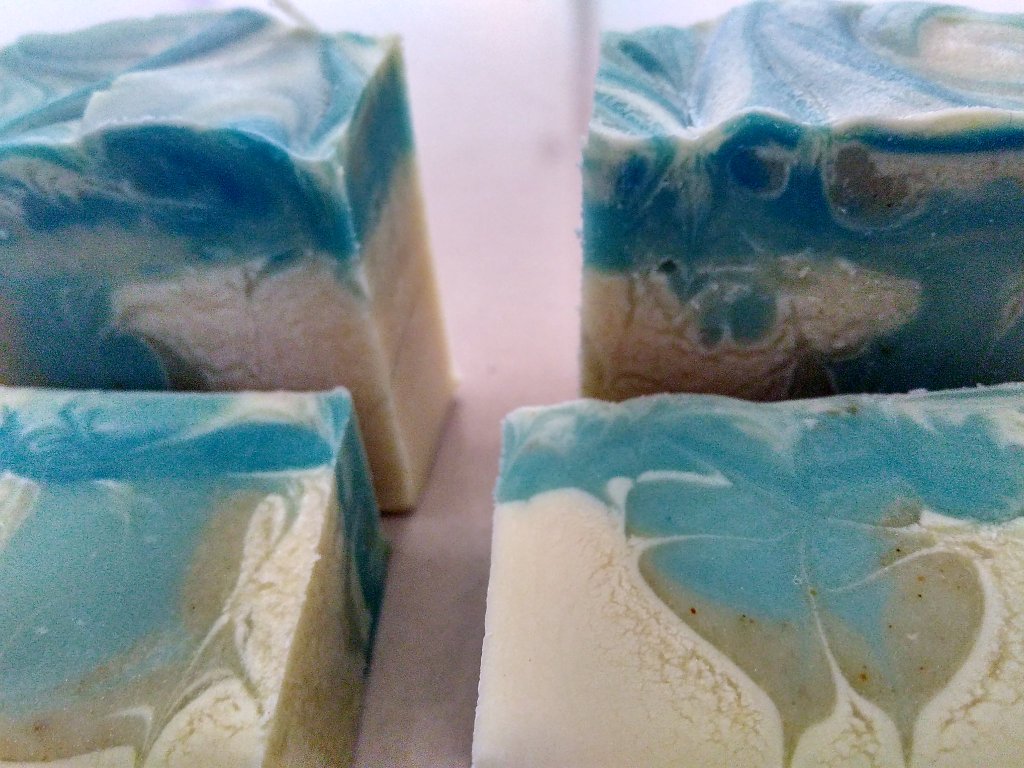
Charcoal and kaolin clay soap scented with holy basil

Charcoal and kaolin clay soap scented with holy basil

But the GST is an odd thing. To sell anything at all online. No matter the amount, you must register and file returns. This would involve creating the paperwork for a business, filing GST for every state that happened to have a person buy a soap or two from me, and generally spending more on paperwork than the actual materials I invested in or profits I made.

It is not worth it. The government clearly wants only people who do business in lakhs of rupees only to be enabled for online business or to pay a disproportionate amount for the right to do it legally. It amounts to charging citizens for the right to sell in the country outside whatever locality they are in. This will discourage businesses with a turnover of less than 20 lakhs, which will be prevented from growing from exposure to nationwide sales unless they take the gamble of committing to filing GST foreverafter in order to find out.

In my view, the GST is unjust to small sellers and particularly seeks to destroy small online sellers. But I am not enough of a businessman to make this battle mine.

Aloe Vera and Khus soap

A healing, soothing, cooling soap with an earthy calming khus fragrance, leaves your skin feeling nourished with aloe vera.

So here is what I am doing. This site no longer sells anything. If you wish to buy, you may come over and meet me locally and buy from me, or get someone to buy locally from me and send it to you. I can pack for shipping.

Alternatively, I can send you gifts of soaps and plants, if you gift me things I covet. No money will exchange hands. Hobbyists trading in things is hardly business. And it is pretty much the scale of what I am up to. Feel free to email me at [email protected] and see what sort of an exchange can be worked out, if you liike something on this site. I suppose I no longer have to limit myself to India.

Also people who help sponsor my writing on aamjanata.com will be entitled to a token gift from here.

Let us see how this goes. Will really be a pity if hobbyists are successfully strangled by the govt.

Thread about the whole thing on Twitter.


Quick fix for curl: symbol lookup error: /usr/lib/x86_64-linux-gnu/libcurl.so.4: undefined symbol

So you’re trying to install something or compile something or you have curl installed, but it won’t work, because….

# curl -V
curl: symbol lookup error: /usr/lib/x86_64-linux-gnu/libcurl.so.4: undefined symbol: nghttp2_http2_strerror

Or it may be some other package doing this. If you land up on this obscure blog searching, chances are you already have been pulling your hair out wondering what to do.

Here is what I finally did in order to be able to get on with life. Please note, I am not a programmer or any kind of expert and do this at your own risk. I have no idea what you may break. In my case, it was a package I was fairly certain doesn’t belong on my system and isn’t installed.milfster.org comic xxx

Anyway, without further ado, here’s the magic pill.

# ldd /usr/bin/curl|grep /usr/local
	libnghttp2.so.14 => /usr/local/lib/libnghttp2.so.14 (0x00007f8a763ca000)
# mv /usr/local/lib/libnghttp2.so.14 /usr/local/lib/libnghttp2.so.14.bak
# curl -V
curl 7.52.1 (x86_64-pc-linux-gnu) libcurl/7.52.1 OpenSSL/1.0.2l zlib/1.2.8 libidn2/0.16 libpsl/0.17.0 (+libidn2/0.16) libssh2/1.7.0 nghttp2/1.18.1 librtmp/2.3
Protocols: dict file ftp ftps gopher http https imap imaps ldap ldaps pop3 pop3s rtmp rtsp scp sftp smb smbs smtp smtps telnet tftp 
Features: AsynchDNS IDN IPv6 Largefile GSS-API Kerberos SPNEGO NTLM NTLM_WB SSL libz TLS-SRP HTTP2 UnixSockets HTTPS-proxy PSL 

aaaand… we’re in business. As you clearly see, it is going to be suicidal if you rename something important. So like I said, no guarantees here. It is probably not the correct way of dealing with this, but I am beyond the point of correct now, and this works.

What I have basically done is checked the file referring to the non-existing package causing the problem and renamed it. I imagine you could move or delete it, but if you delete, and this doesn’t work, you can’t bring it back.

Final tip: If you’re using php-curl (or php7.0-curl) with Nginx, you’re still going to be haunted by the problem you have fixed unless… you restart php-fpm 🙂

#service php7.0-fpm restart

Now really done.

Google AMP and four drawbacks

Godfather google has foisted yet another of its whims on us. As always, it is for our own good only. Because we are too stupid to design sites that look good in mobiles that load faster, Google has come to our rescue because everyone wants a faster web, right?

In theory there is nothing wrong with a faster web. As someone who has waited ages for some important page to load quite often, I do appreciate that it is important that sites load reasonably fast. But I don’t really think I’ve insisted on a site loading under two seconds or something or I’ll give up on what I want to know. Such a problem, in my view is for someone who is creating content which isn’t really compelling and giving someone time to change their mind will make them change their mind. If anything, if google is committed to a quality, it should not be too worried about people having time to chang their mind. But that is another issue. A fast loading site is definitely not a bad thing. But…

I don’t see why google needs to serve our content from the google site. First caching pages that people can view, which already was objected to by people, but was not such a big issue, because it is inconspicuous as a feature and offers visitors to still read our content if our site is experiencing problems. But with AMP, they have taken serving content created and owned by others to a whole new level.

A fan of AMP may argue that you can easily choose not to offer AMP pages. But here is the thing. If not using AMP pages means my site will suffer in search results – where Google has a monopoly, then it is like the Indian government saying Aadhaar is purely voluntary, except you can’t get your pension, your phone, your bank account or passport or pretty much anything needing documentation without it. But it is voluntary. It is nonsense. It is coercion. And the dishonesty makes it even worse than an openly autocratic model, because it conceals the act from those who will be impacted by it. Let us not mince words here.

So I have AMP installed on one of my sites. aamjanata.com

I have not perceived any dramatic improvement in speed. My site was already loading under two seconds without AMP. On mobiles. In fact, the site loads faster on mobiles than the AMP version. So other than the mobile search traffic that Google is holding me hostage with, what value is being added at all?

Here are the four biggest drawbacks I have experienced in using AMP:

Man In The Middle

I recently had an argument with someone who had agreed with me about Cloudflare being as good as a sanctioned MITM. The access is there. The intent is reassured by the reputation of the organization, but let us not pretend there aren’t ways of arm twisting organizations to bend rules for governments. Or, as we recently saw, Cloudlfare can indeed be insecure or be hacked. Yet this person happily has an AMP version of his site. Sadly, so do I. For the “traffic”. Of course, it is transparently served from google, but that is the point – my website is NOT google. But recently I’ve started wondering whether it is worth it to cater to Google’s arbitrary technologies because they’ve taken it upon themselves to set the standards. Do I really need that difference in mobile traffic enough to be okay with people seeing it on another site? That is what google is. It is another site. Not mine.

Speed, ironically

I have found that it is a far shorter learning curve to make a website perform well than it is to figure out how to serve good AMP content. Then figuring out the ads and what not. And all the plugins piled on to do all that adding bloat to the site. And even with the bloat, the main site being faster than the AMP pages. If Google’s priority is their openly claimed intention of making websites faster, Mobile search should have automatically served the actual website when it is faster than the AMP pages. So why doesn’t google do it?

Lost functionality

There are many interactive things that can be done on a website – prompting for enabling browser notifications, for example. Or, as in the case of aamjanata.com – it is a PWA, so a mobile visitor to the website can actually install the site on their phone as an app and even access cached pages viewed previously while offline – no way Google AMP can beat this speed, right? It is harder to subscribe visitors to newsletters and such from AMP pages. You can’t use interactive prompts. Unless you really put the subscribe form before the content (which would distract them from reading it to begin with) you have to pray really had that the reader reaches the end of the flat content.

Limited formatting

In the age of page builders, let me just say point blank. AMP pages are pathetic. Granted I haven’t been interested enough to maximize my geekery in trying out things, but that is also frankly because I didn’t find options that had me itching to try them out. It is a page I am building for Google. Not my readers and not to show off my content either. It doesn’t get more uninspiring than that, so well, that is that.

So I am an inch away from ditching AMP and uninstalling all the bloatware from my blog ASAP.

How do you handle these issues? Have you found any advantages to AMP? Have you decided to ditch AMP? What was your experience with the tradeoff in traffic? Do comment.


vertical garden varieties

Growing vertically in the balconies

Here are some of my best tips for growing max vegetables in small balcony space and such.

Go vertical

If horizontal space is limited, don’t just think of how much you can put on the floor. Look up the walls, up grills. Think vertical. There are many possibilities. This photo below shows three different vertical systems on just one wall.

vertical garden varieties

Here are three different ways I’m growing vertically on just one wall of my balcony

The first is a modular system you can buy. The pots can be put on the frame and taken off easily and I keep changing them depending on what needs the growing room.  I’ve put two sets of these panels perpendicular to each other to conceal a drainage pipe going thrrough the balcony. You can see that more clearly in this photo.

Mint growing in a vertical planter

Mint growing in a vertical planter

The three pots on the bottom left are the result of a little half bottle with some sprigs of mint stuck in. Once they needed more room, I gave them more room. If some day I decide I don’t need so much mint, I’ll take out a pot or two or if I need more, I might move the whole thing to a larger tub to spread out and grow. On the right is lemongrass. Now here’s the thing. Above the lemongrass and mint are tomato seedlings! They have outgrown their seedling trays and are perfect for using this size of pot for a while before being planted into something more permanent.

Improvised vertical gardens

The second is a vertical system made of old 2 liter cold drink bottles. Selling them won’t get any money and even recycling wastes resources to transport and process. Why not use them right here at home?

So, a vertical planter doesn’t have to be this premediated, permanent thing that you plant and maintain for a long time. You can use it as an intrmediate pot for a plant growing its way to a larger pot too. Next month, those pots will have something else in them.

Vertical garden from scraps of tarpaulin like cloth pieces

Vertical garden from scraps of tarpaulin like cloth pieces

It doesn’t even have to be proper materials. I put this together by tying/stitching up some tarpaulin sheet like material pieces with plastic string. It didn’t last long. Once the plants growing in it were done, I had to trash it too.

Remixed vertical gardens?

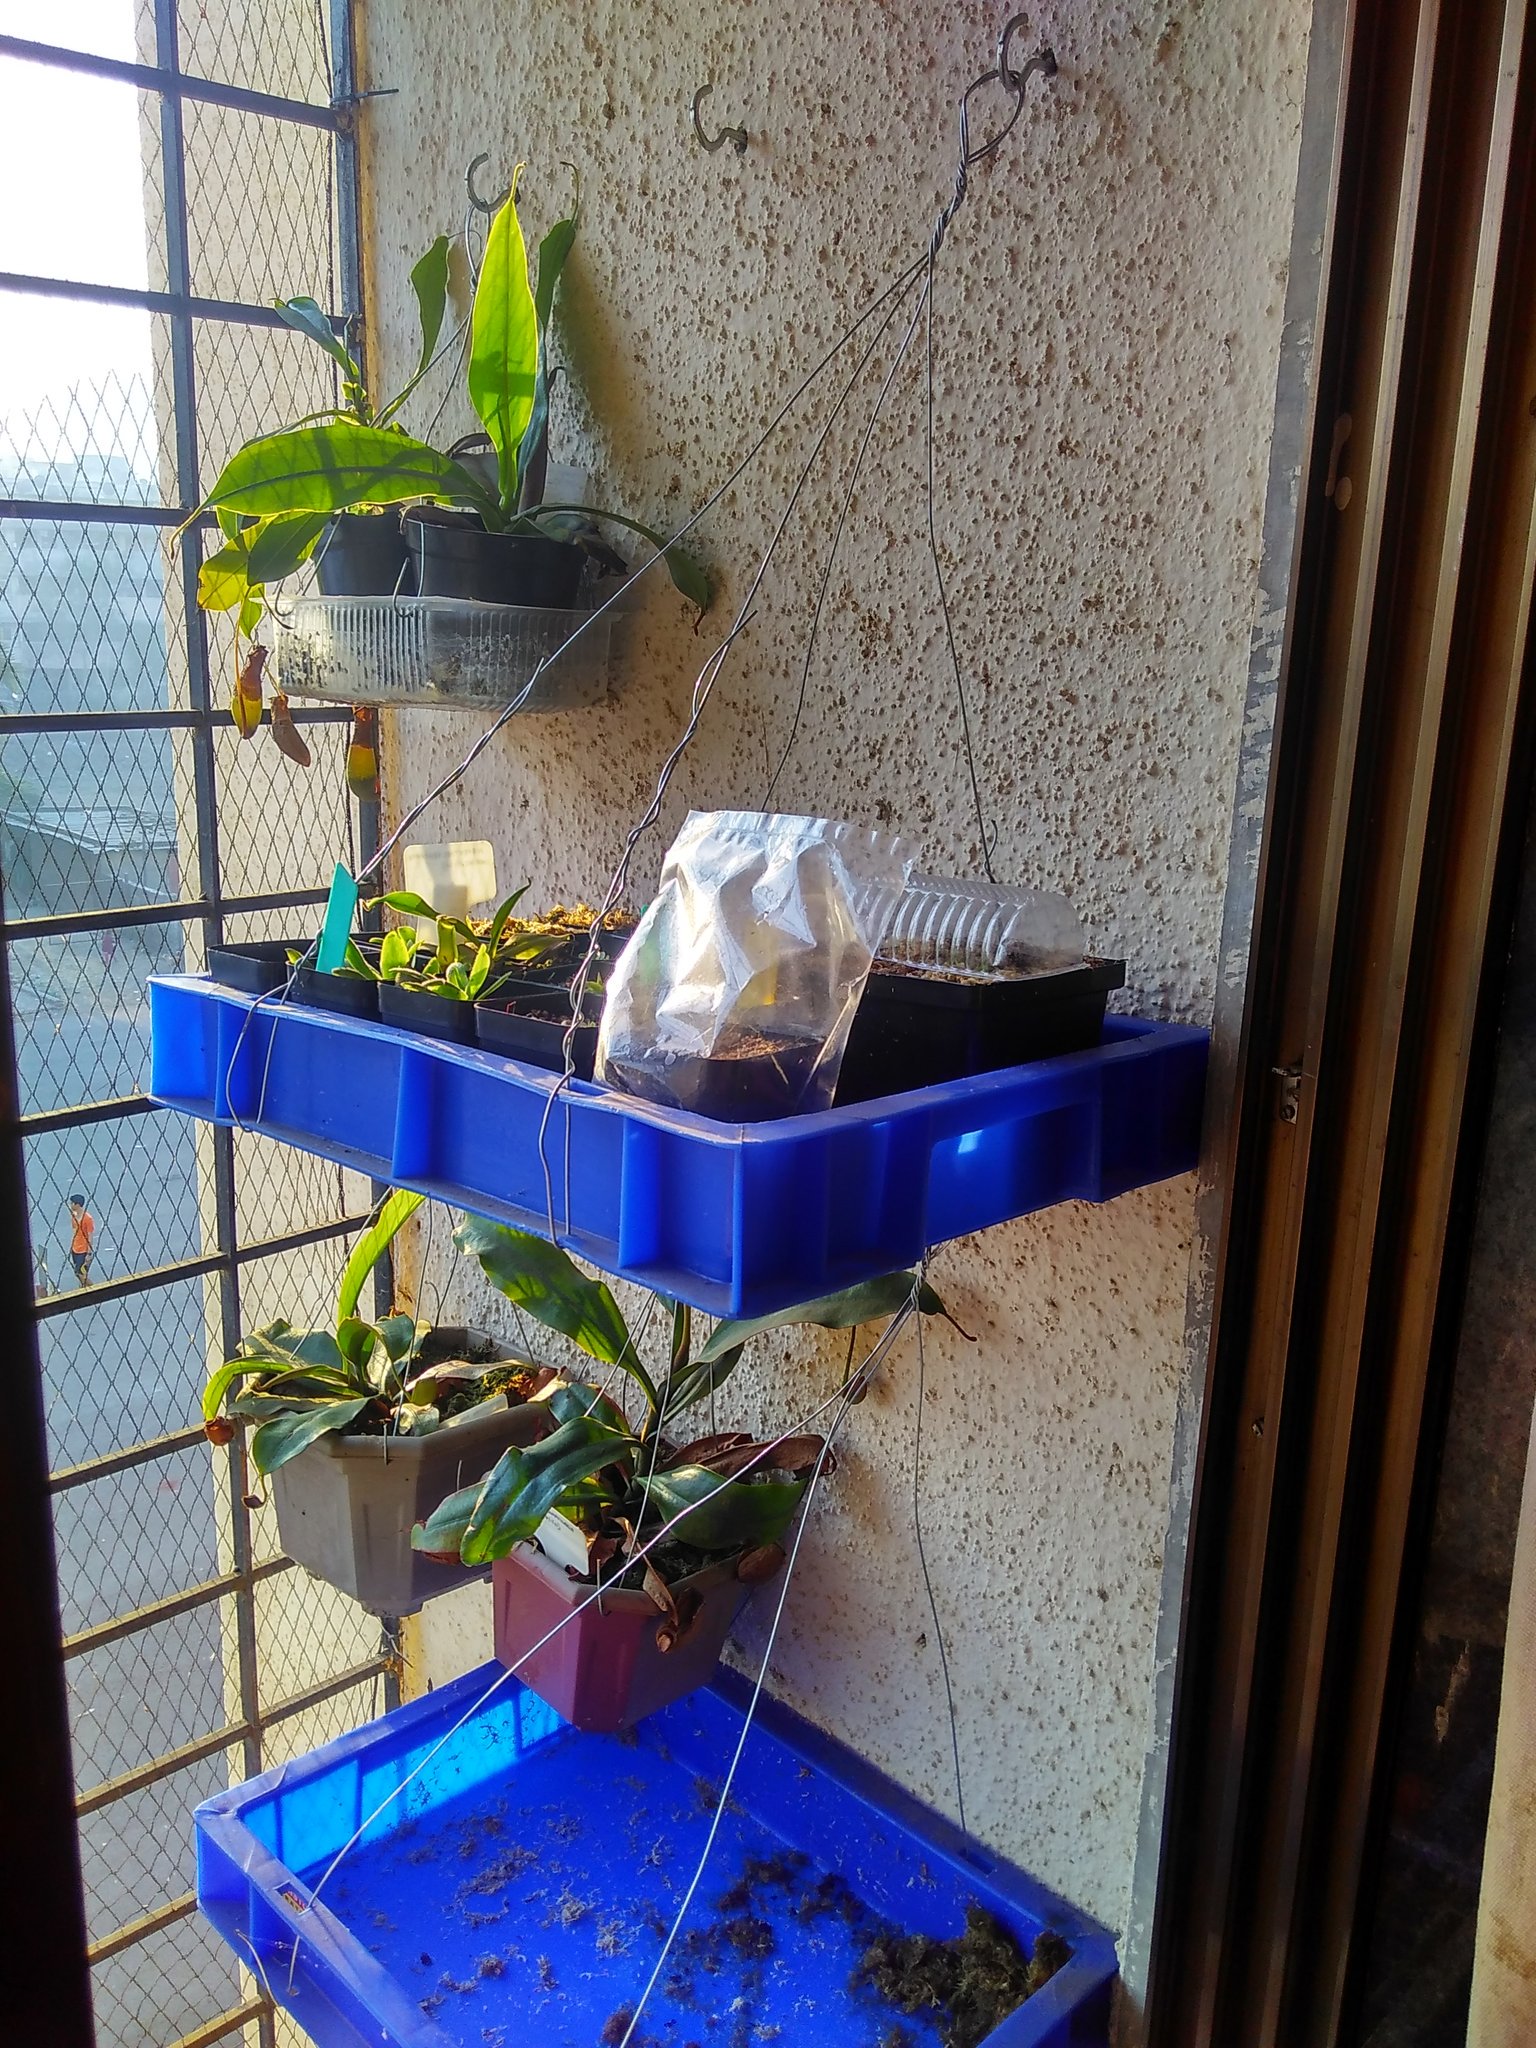
The third in that top photo is a hard plastic net I’ve suspended down the wall. I hook any kind of a pot I wish onto it. Right now it is a set of rectangular planters. On another wall, I’ve suspended pots and entire trays for my carnivorous plants from hooks on the wall.

Growing carnivorous plants vertically

Growing carnivorous plants vertically

Sometimes you don’t have a wall to hang things on. So you can stack pots up.

Stacking pot sets

Stacking pot sets

These sets of stackable plant containers are found commercially for purchase, but you can really stack anything as long as it will stay stacked.

And of course, you can just send cucumbers and other vining plants up the grill…

Using the balcony grill as trellis for cucumber and bitter gourd

Using the balcony grill as trellis for cucumber and bitter gourd

This has the added advantage of screening the windows from direct sunlight and helping keep the home cooler in summer.

If I planted all this in pots spread on the floor, I wouldn’t have room to grow anything else! But this balcony faces east and the wall gets great light all morning and is bright all day. So why not…

Container sizes matter

mint cuttings rooting sphagnum moss

I’ve started these mint cuttings in some sphagnum moss in a bottle cut in half.

In the photo above, I’ve cut a half liter mineral water bottle to make a cup (it was cracked). I put some sphagnum moss into it and stuck some sprigs of mint I’d got from the market. They rooted. I gave several of them around and planted these remaining ones, pinching them back and taking further cuttings from those that grew long till they filled the three bottom containers in the photo with the black vertical garden pots.

Plants grow best when their roots have adequate space. However, when you don’t have a lot of space, it can get tricky to provide plants all the space they need. I have found that this is possible to manage with careful timing and a little extra effort by potting up plants as they grow instead of directly planting them in large pots. This works very well with plants like tomatoes and capsicum, less well with fast growing plants like cucumber. Keeping the smaller pots off the floor allows me to use the space on the floor for the big containers for cucumbers, tomatoes, sweetcorn, okra

Byblis liniflora germinated

Byblis liniflora and Byblis guehoi seeds are germinating!

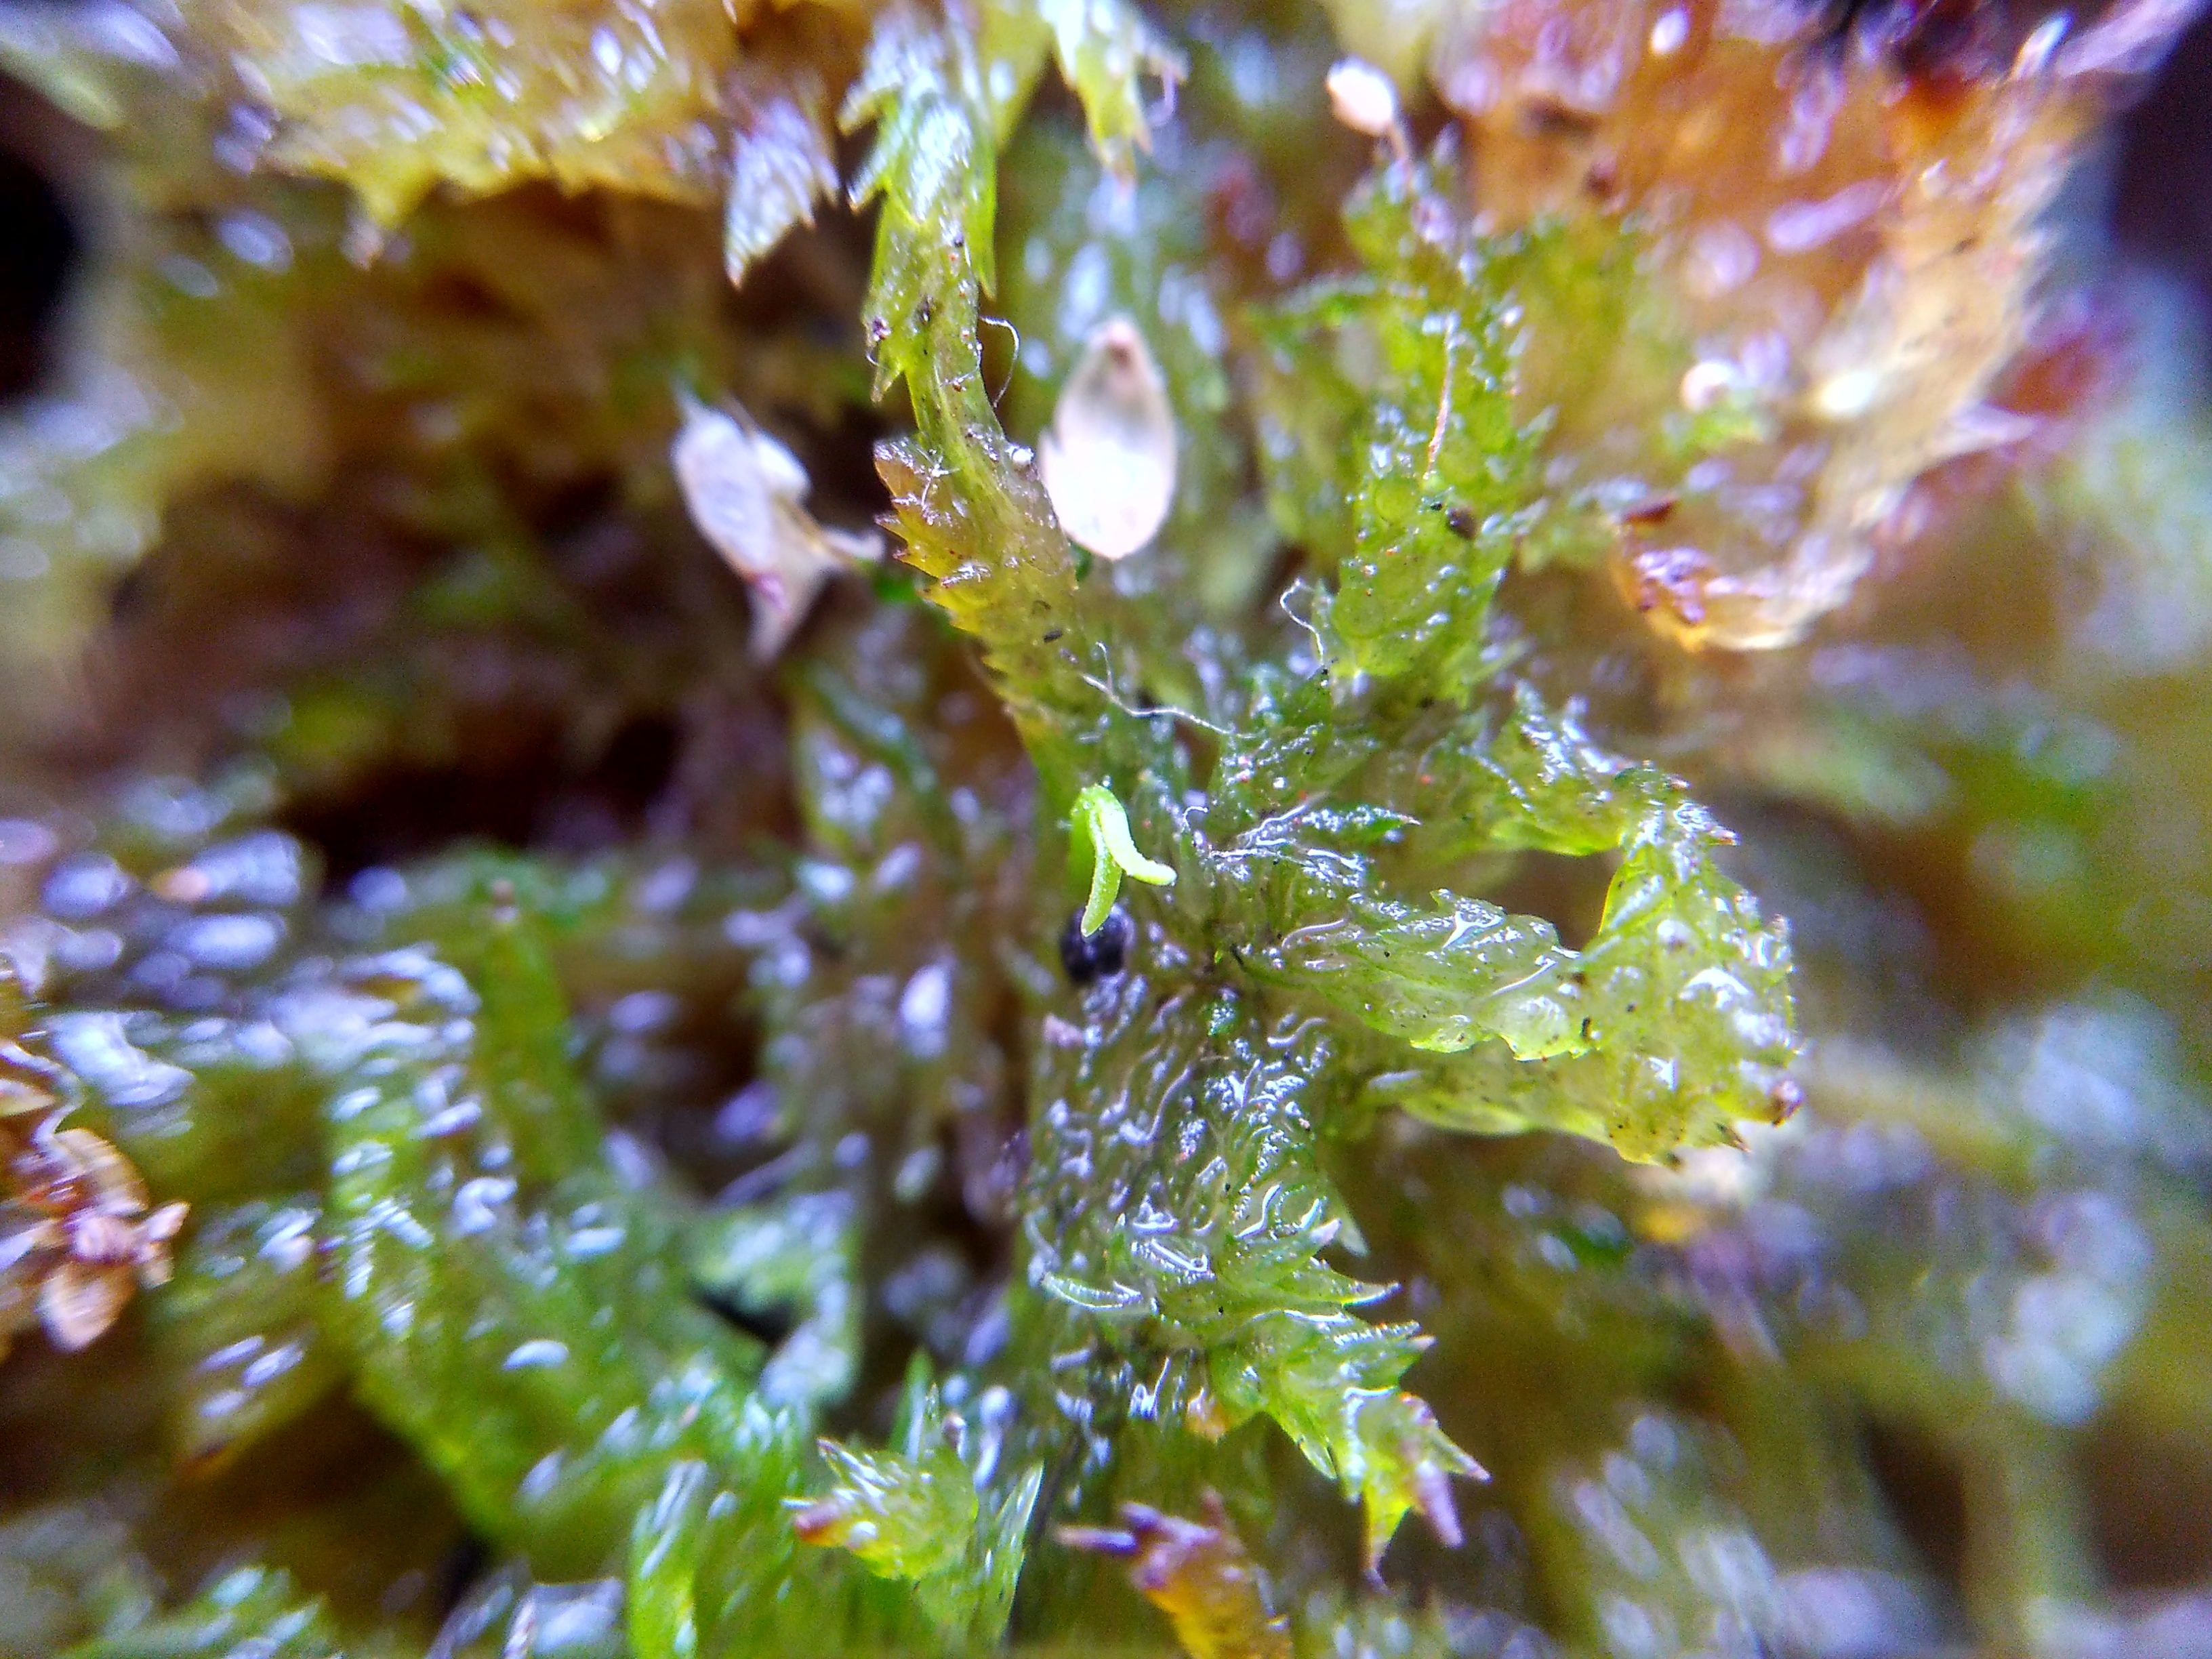
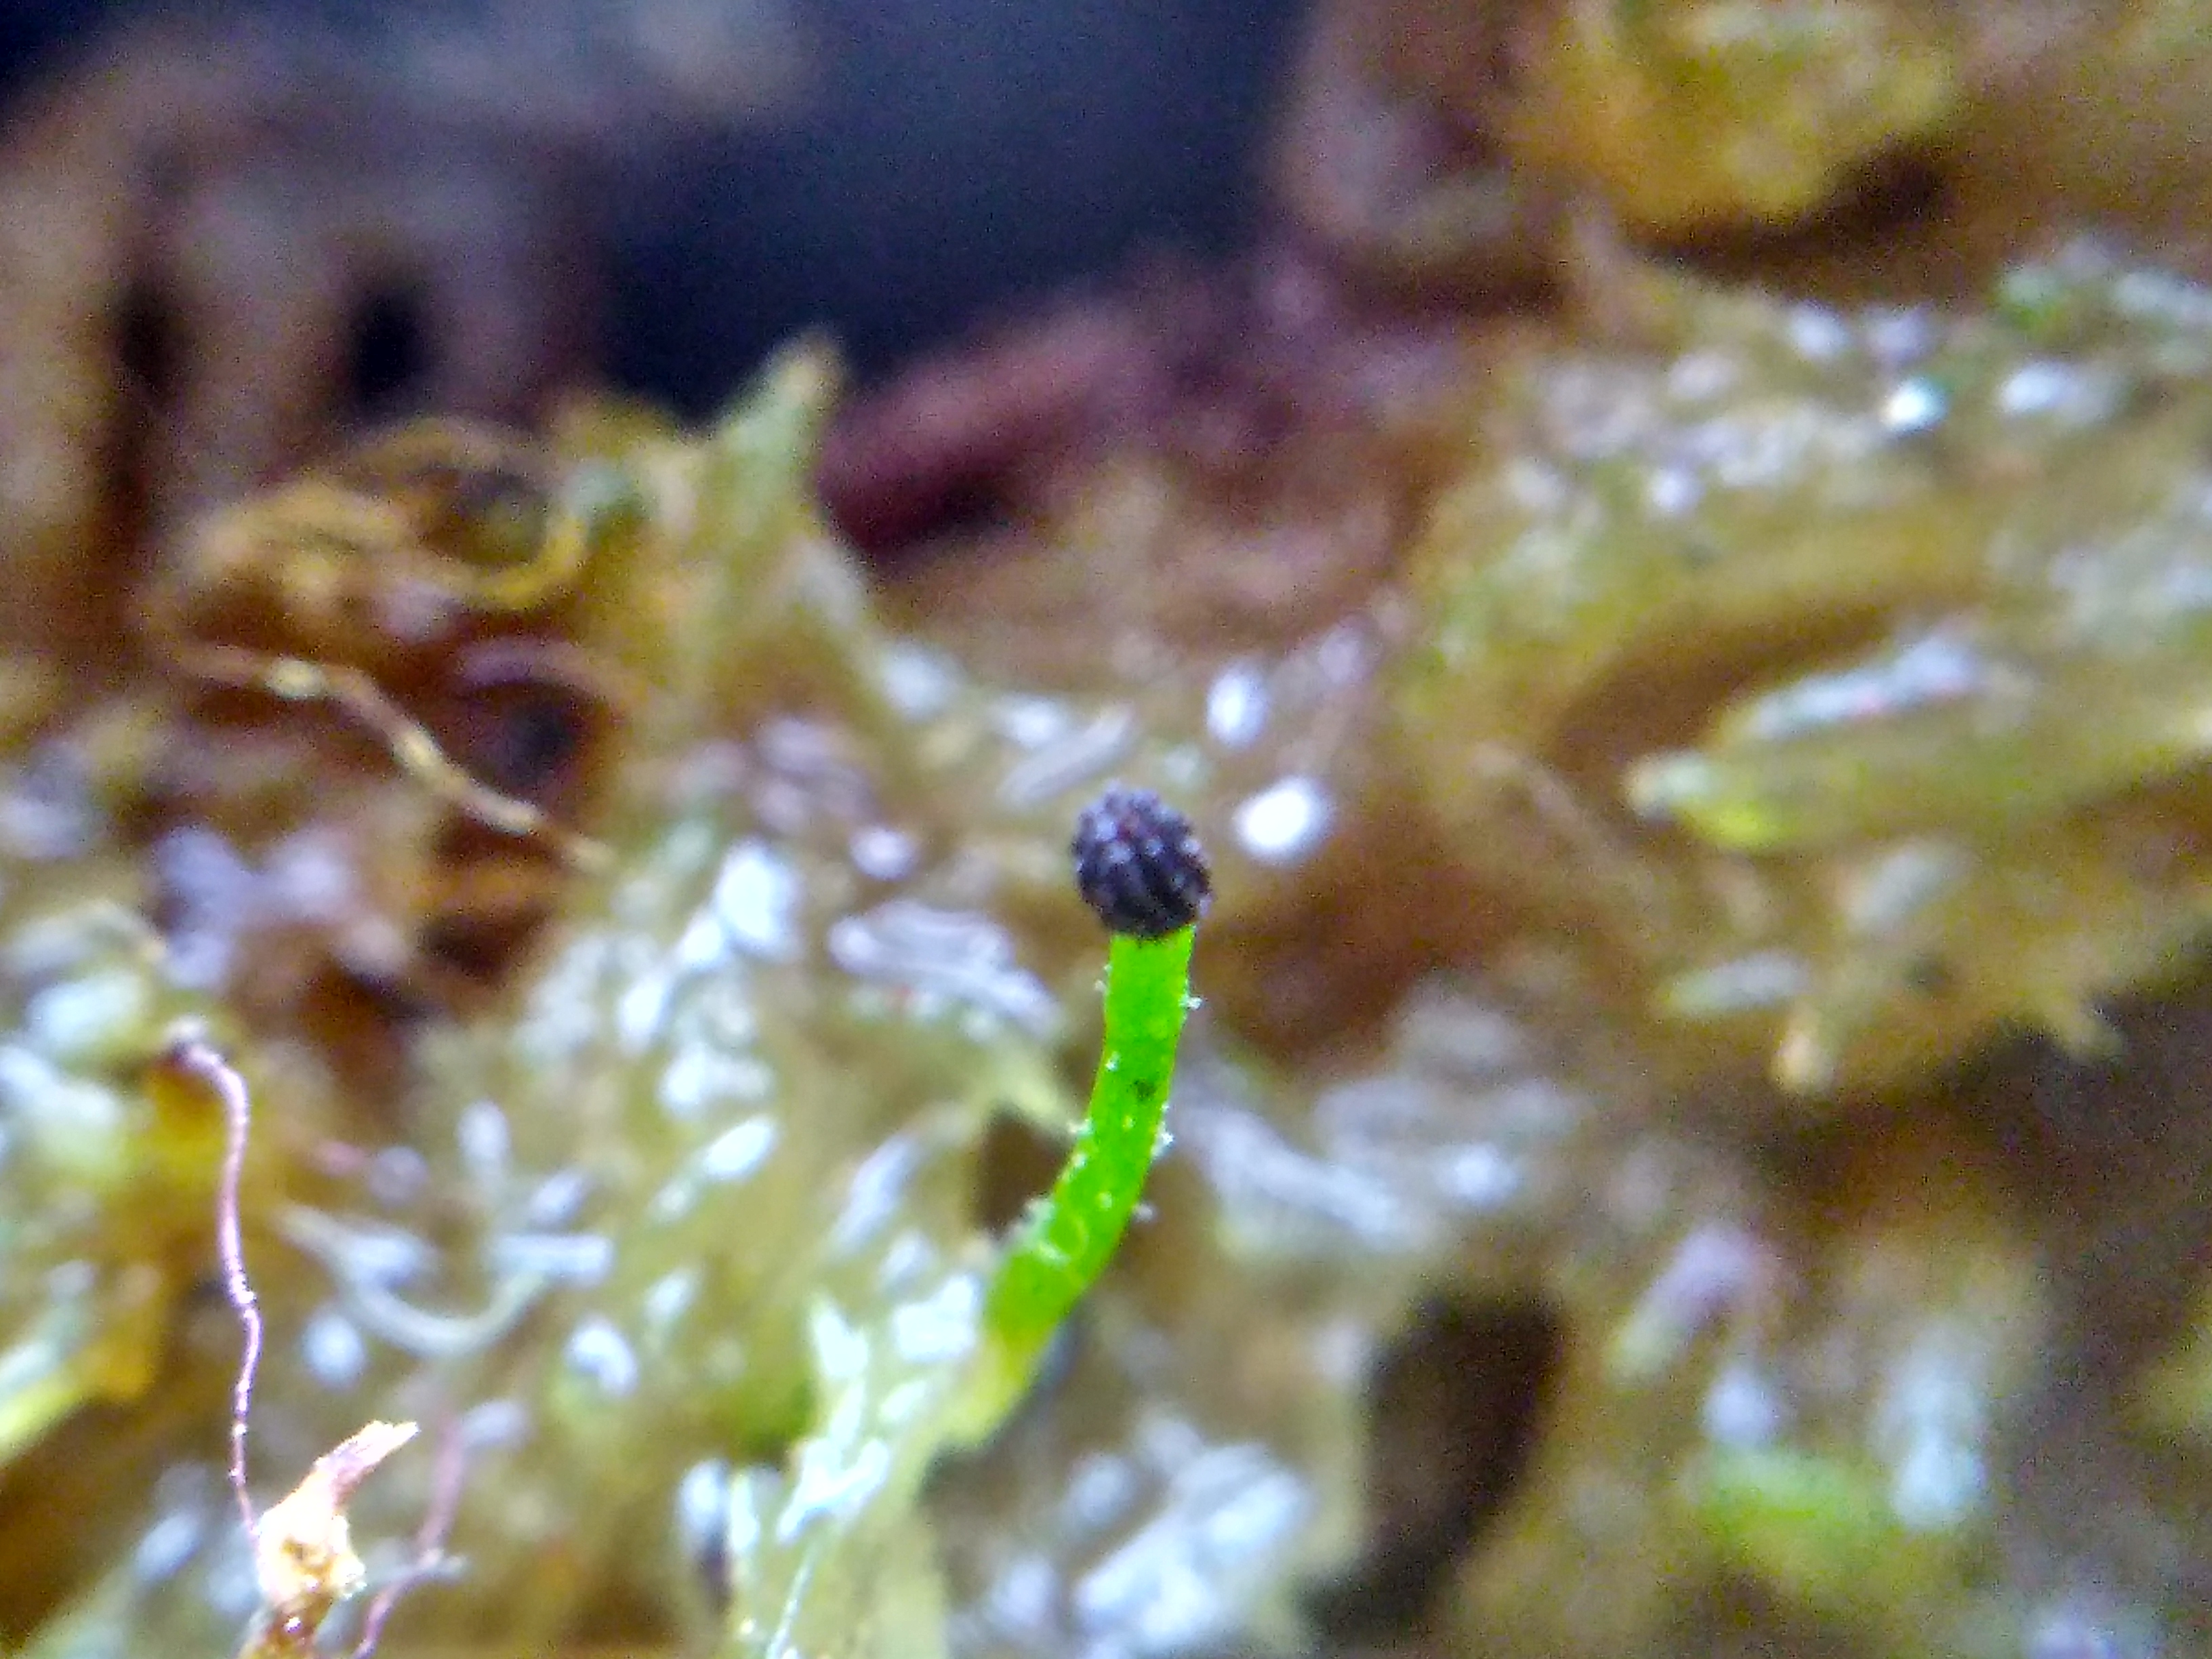
I had purchased several seeds of Byblis, also known as rainbow plants. Of these, Byblis liniflora and Byblis guehoi arrived on the 23rd of Jan 2017. I sowed the byblis liniflora seeds immediately into sphagnum moss (see end for growing conditions) and soaked the Byblis guehoi seeds in Gibberellic acid for a day and sowed them on the 24th. Two byblis liniflora seeds to a cell and one byblis guehoi seed per cell (no particular reason other than the number of seeds I had). By the 29th, I had germination! WOW. That was fast. I was expecting to have to wait for weeks. While several seeds of both types were showing tiny specks emerging, ranging in color from white/cream to a pale green, I could only get a decent photo of a couple of byblis guehoi seeds germinating that seemed to be slightly bigger than others. So here they are.

Byblis guehoi seed beginning to germinate

Byblis guehoi seed beginning to germinate

This was on the 29th Jan. Now it is three days later, and on the 1st of Feb, 2 byblis liniflora seeds that had bare specs of pale green hinting in the name of germination are already free of their seed coats.

Byblis liniflora seedling emerging from seed coat

Byblis liniflora seedling emerging from seed coat

They are really tiny. Perhaps 2mm or so in size, but they got upright over the course of the day and now look like seedlings. What I find amazing is that miniature as they are, they already have very tiny tentacles with very tiny droplets of dew!!!

Byblis liniflora germinated

Byblis liniflora germinated. The whole seedling is about 2mm in size right now.

On the other hand, the byblis guehoi from the first image….

Byblis guehoi germination

Over the course of three days, the emerging seedling has become upright and taller – almost half a centimeter, but it is still not emerged from its seed coat.

Well, it is taller. At least 4mm, likely 5mm or more (tough to actually measure in there) and it is more upright, but it is still… emerging. I nudged it very gently to see if the seed coat had actually come off and it was a matter of falling off, but nope. It is still quite firmly attached. The seedling is not done emerging. Reminds me of the process of birth – which it is. You see a newborn and wonder how all that fit in there…

Right now, it is just looking like a stalk. There will obviously be two cotyledons, like the other seedling, but they are either held so tight together by the remaining part in the seed so as to seem to be a stalk, or this is really the stalk and the cotyledons are still to emerge. In either case, it is quite evident that the byblis guehoi promises to be quite a bit taller than the byblis liniflora – if these baby steps are any measure.

Growing conditions for byblis liniflora and byblis guehoi

I have put the seeds in individual cells in long fingered sphagnum that has been well rinsed and is “on the verge” of becoming alive. My previous attempts at growing carnivorous plants have taught me that in our climage, they really do better in live sphagnum, which protects them from the heat come summer as well as provides some humidity with the constant evaporation. However, pure live sphagnum tends to grow a bit fast and smother seedlings, so what I’ve started doing is using long fingered sphagnum that is dried – but not completely dry, so over time it definitely comes back to life, but not fast enough that the seed can’t get tall enough first. This is dried sphagnum that will generally show a few green stems immediately on being hydrated (which I remove to the live sphagnum culture). As it remains moist, over a period of days, weeks, it slowly gets greener (some of this will be algae) and starts sprouting. I figure it is the best of both worlds.

As far as the potting mix goes, both of them have identical conditions. However, my balcony, where they rest is on a slight slope and the side with guehoi is placed toward the higher end so that the tray dries out slightly earlier on its side than on the side of the liniflora. I’ve done this with some success with other plants which prefer more or less wet conditions than their companions and it is a good use for the sloping floor (which I’d otherwise have to compensate by raising the tray on the lower end a bit so that it is level). I did this because all the reading on the internet so far seems to indicate that byblis liniflora seems to like wetter conditions than byblis guehoi.

I will be observing this and using the information to plan the potting mix for their final pots. I have put them in cells on purpose so that they can be individually popped out and planted into a larger pot as a chunk without disturbing their roots. This will allow me to let them grow a bit before having to rush to transplant them into their final pots before their root system establishes. This also means that it gives me more time to observe and plan the potting mix of their final pots.

I use RO water for these. Every once in a week or so, I take the seedling trays out of the water trays and wash the water trays thoroughly and wipe the underside of the seedling trays clean as well to avoid any nasties growing in the water. I let the trays dry out before adding more water – but not for very long. The moss on tip is always moist. No top watering for now.

The trays are open and get good air circulation and about 4-5 hours of morning sunlight. I suppose I could cover them, but every time I’ve covered seeds, I’ve had problems with fungus, damping off and rot – I think something about our climate (warm, humid). So this time I’m keeping them airy.

That’s about it. I can’t think of anything else I did specifically. Feel free to ask away in the comments.

Though of course, germinating these is just part of the battle, and the real war is keeping them alive beyond the seedling stage.