Part of the Lekhak guide.
Write and edit
The editor
The editor is a rich-text editor that stores what you write as ordinary HTML. Select text and press Ctrl+I, Ctrl+B or Ctrl+U; use the paragraph style box for headings and body text; the alignment buttons do what they say. The usual stuff.
Images go in through Edit → Insert Image…: pick a file and Lekhak copies it into the project so the document travels with it. Alignment is the only layout on offer — inline, left, right or centre — because anything beyond that is a different kind of software. Left and right float the image with text flowing around it; centre puts it on its own line.
The word count for the document you’re writing as well as the book update live in the bottom right status bar.
The unusual stuff are the buttons unique to Lekhak. If you have TTS configured, the "Read aloud" button will read your text aloud. If you have an AI configured, the "Proofread" button can check your text and suggest corrections as tracked changes that you can accept or reject. At no point will your text be altered without your knowledge.
What text is decided by this:
1. If text is selected, it will be read/proofread.
2. If you place your cursor in the text, from there onwards.
3. If no cursor is active in the text, the whole document.
Split at the cursor (Ctrl+K) splits a document. Undo/redo, find/replace, focus mode and zoom are all available; the editor remembers where you were.
Styles, fonts and zoom
Paragraph styles live in the toolbar above the text. A style is a paragraph’s role (Heading 1, Quote, Body Text); it is not a font setting, so changing the body font later does not disturb your headings.
You can create and update styles in the editor itself. If you select a text and right click, you will see options to set the style as default, create new styles, or update an existing style. You can’t delete styles in the editor – you will have to go to preferences for that.
If you select unusual fonts in the editor, the export keeps them as named; the machine that opens the file needs those fonts installed. Please note, epubs uploaded to Amazon KDP may ignore formatting entirely or to various levels between the platform itself and the user’s preferences – this is outside Lekhak’s control.
Ctrl+plus and Ctrl+minus make the letters bigger or smaller for working in the editor without touching the font-size in the document at all (just like a browser). Ctrl+0 resets the zoom. This is the zoom you use for reading; it never becomes part of your formatting.
Focus mode
F11 hides the binder and the inspector, leaving only the page. It is the whole window for the words, and F11 brings the rest back.
Dates and page breaks
Edit → Insert Date puts the date at the time of writing at the caret; Insert Date and Time puts the date and the time. The format follows your system’s locale.
Add something like not to be confused with $${currentDate/time} placeholder which will insert the date/time at the time of compiling. A plain $${Date} placeholder is deliberately left available for you to use in your metadata if you need it, and it can be whichever date you want – you could insert the current date in its value, or a book set in a different time period could use it for the in-world date value. These explanations are simply added here to avoid confusion with the inserted date from the editor, which is directly the date at the time of insertion as text.
Ctrl+Enter inserts a page break: the text after it starts a new page, and the page view shows it there.
Paste
Paste is where Lekhak solves a common problem faced by writers who may need to copy-paste text back and forth for submitting for feedback or applying edits. Pasted text inserting the formatting like fonts, sizes and indents of the source text creates uneven formatting in the project, OR the opposite problem, where Ctrl+Shift+V strips all formatting and you lose your precious italics for emphasis, thoughts or other in-world elements.
This developer being an author with an active critiquing life herself, understands this. The default paste in Lekhak never inserts alien document formatting like fonts, indents, line spacing, sizes, etc, while retaining the character level emphasis, like italics, bold, or underline. So you can paste content into your document without worrying about the published document containing mangled formatting.
If your need to include/exclude formatting from the source changes, you can alter the behaviour of the default paste in preferences.
Paste comes in three flavours, chosen in Preferences:
- Plain text — the words, none of the styling. Ctrl+Shift+V – unchanged.
- Normal — bold, italics and underline, but not fonts and colours. Ctrl+V – our unique paste.
- Keep all formatting — everything, as it came. (No shortcut; use Edit → Paste and Keep All Formatting.)
Plain text is the safe one when you are pasting from a web page that would otherwise bring its own fonts along.
Finding and replacing
Ctrl+F searches inside the document you are in. Ctrl+Shift+F searches the whole project, and Ctrl+Shift+H searches and replaces across it.
The project-wide search lists every place the words appear, so you can jump from one to the next — useful when a character’s name has to change in forty places, but replacing all is risky or when you want to know whether you have already said something.
Quick Open (Ctrl+Shift+P) jumps to any document by title. Standardise (Edit menu) normalises things like smart quotes or spacing.
Wiki links use [[Title]] to link to any section; hover to preview, click to jump.
The inspector can show Mentions / Mentioned by and Related files (documents that link to each other). The mentions scan can be toggled in Preferences → Links if it is distracting.
Page view and pagination
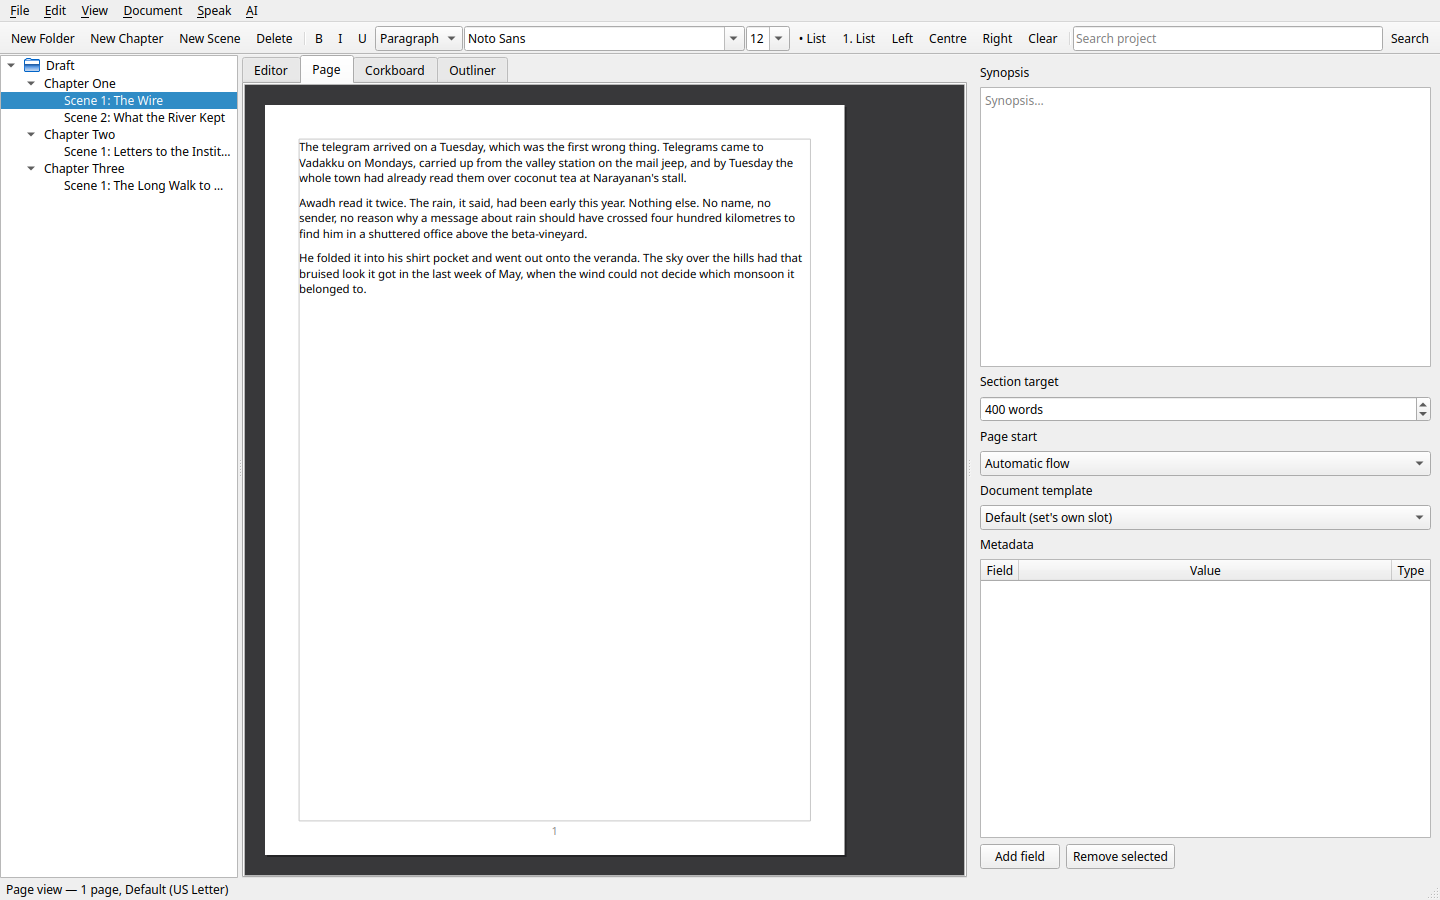
Page View (a tab beside the editor) shows the manuscript paginated as it will print — paper size, margins and all. Page breaks you insert by hand and those from page setup/templates are shown.
Print (Ctrl+P) sends the same PDF to your system print flow, using the template set for the current scope.
Word counts, goals and progress
Word count is shown on every document, folder and the project in the binder and status bar. Reading time estimates are shown where counts appear. Session goal and per-section word goals can help track progress; the status bar clears honestly when nothing is selected.