Category Archives: Container Gardening

No longer selling soaps or carnivorous plants because of GST 1

No longer selling soaps or carnivorous plants because of GST

Update: The government has now allowed online sellers the same exemption from having to register for GST as regular sellers. So I am once more selling soaps and carnivorous plants.


This blog is basically about the stuff I am up to at home. When I make artistic soaps because I enjoy making them, I sell the surplus, because there is only so much bathing one can do. When I grow plants (mostly carnivorous, but some others too), I sell those I grow in excess and seeds so that people interested in these hard to find plants can obtain them and grow them themselves. I’ve spent far more than I’ve earned on both h0bbies, but the purpose of doing them was never to do big business. Could I expand if I wanted to? Sure. But I am a loner, thinker at heart. Spending my day selling stuff is not a vision I hold for myself.

vertical garden varieties

Here are three different ways I’m growing vertically on just one wall of my balcony

The little money I did get was spent right back on obtaining more obscure plants. Usually from abroad, because the irony of carnivorous plants growing in India is that even as their habitats die, unlike in other countries, enthusiastic citizens have not taken up growing them in private collections. So today, if you want to buy a drosera indica or its seeds, you end up buying from abroad – a plant that natively grows in India and is, in fact named such. There are a few carnivorous plant sellers. All of them online. There simply isn’t enough of a market nationwide for individual sellers to chalk up say…. 20 lakhs in sales a year. Let alone profit.

There are maybe a dozen sellers in the country – 4-5 that I know of. Perhaps a few hundred enthusiasts to buy from them. Maybe a few thousand. Nationwide. I would be surprised if any of the businesses chalk up stunning profits. This is a hobby of lovers. The sales may make minor profits for those who invest space and money, but for the large part in a country where agriculture itself is a loss making proposition, the possibility of obscure carnivorous plants raking in the moolah is remote. Most of us hobbyists, delling as individuals wouldn’t even need to register a business unless there was a proper nursery involved. Certainly not the likes of me, growing plants in my balcony.

Charcoal and kaolin clay soap scented with holy basil

Charcoal and kaolin clay soap scented with holy basil

But the GST is an odd thing. To sell anything at all online. No matter the amount, you must register and file returns. This would involve creating the paperwork for a business, filing GST for every state that happened to have a person buy a soap or two from me, and generally spending more on paperwork than the actual materials I invested in or profits I made.

It is not worth it. The government clearly wants only people who do business in lakhs of rupees only to be enabled for online business or to pay a disproportionate amount for the right to do it legally. It amounts to charging citizens for the right to sell in the country outside whatever locality they are in. This will discourage businesses with a turnover of less than 20 lakhs, which will be prevented from growing from exposure to nationwide sales unless they take the gamble of committing to filing GST foreverafter in order to find out.

In my view, the GST is unjust to small sellers and particularly seeks to destroy small online sellers. But I am not enough of a businessman to make this battle mine.

Aloe Vera and Khus soap

A healing, soothing, cooling soap with an earthy calming khus fragrance, leaves your skin feeling nourished with aloe vera.

So here is what I am doing. This site no longer sells anything. If you wish to buy, you may come over and meet me locally and buy from me, or get someone to buy locally from me and send it to you. I can pack for shipping.

Alternatively, I can send you gifts of soaps and plants, if you gift me things I covet. No money will exchange hands. Hobbyists trading in things is hardly business. And it is pretty much the scale of what I am up to. Feel free to email me at vidyut@vidyut.info and see what sort of an exchange can be worked out, if you liike something on this site. I suppose I no longer have to limit myself to India.

Also people who help sponsor my writing on aamjanata.com will be entitled to a token gift from here.

Let us see how this goes. Will really be a pity if hobbyists are successfully strangled by the govt.

Thread about the whole thing on Twitter.


vertical garden varieties

Growing vertically in the balconies

Here are some of my best tips for growing max vegetables in small balcony space and such.

Go vertical

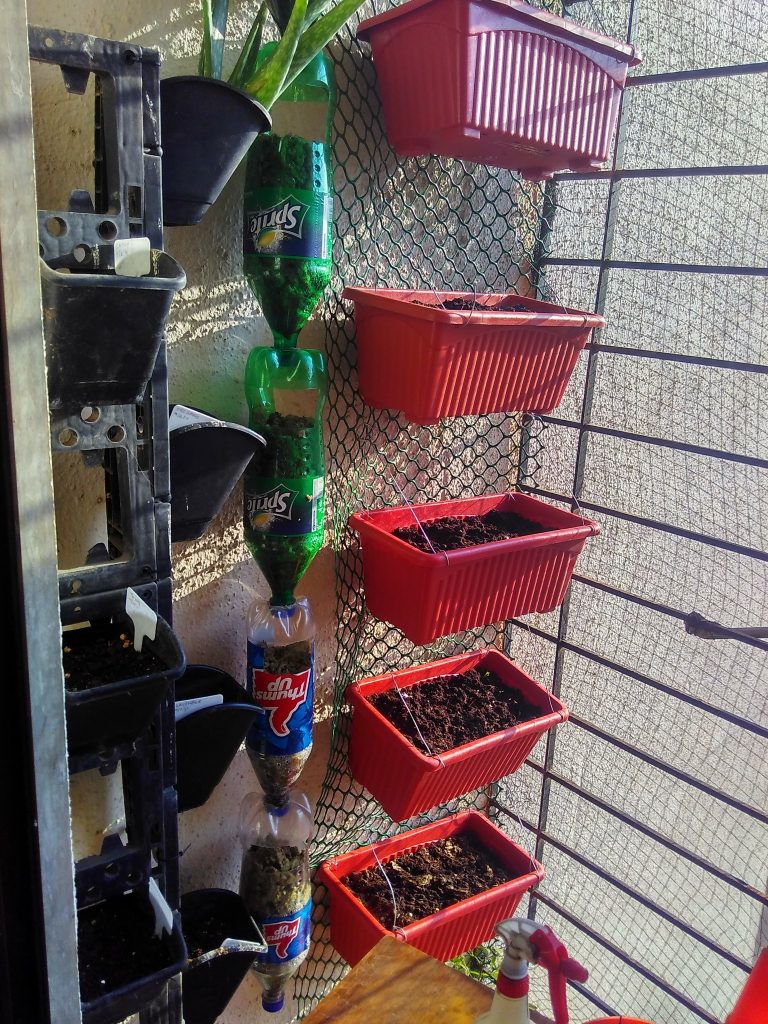
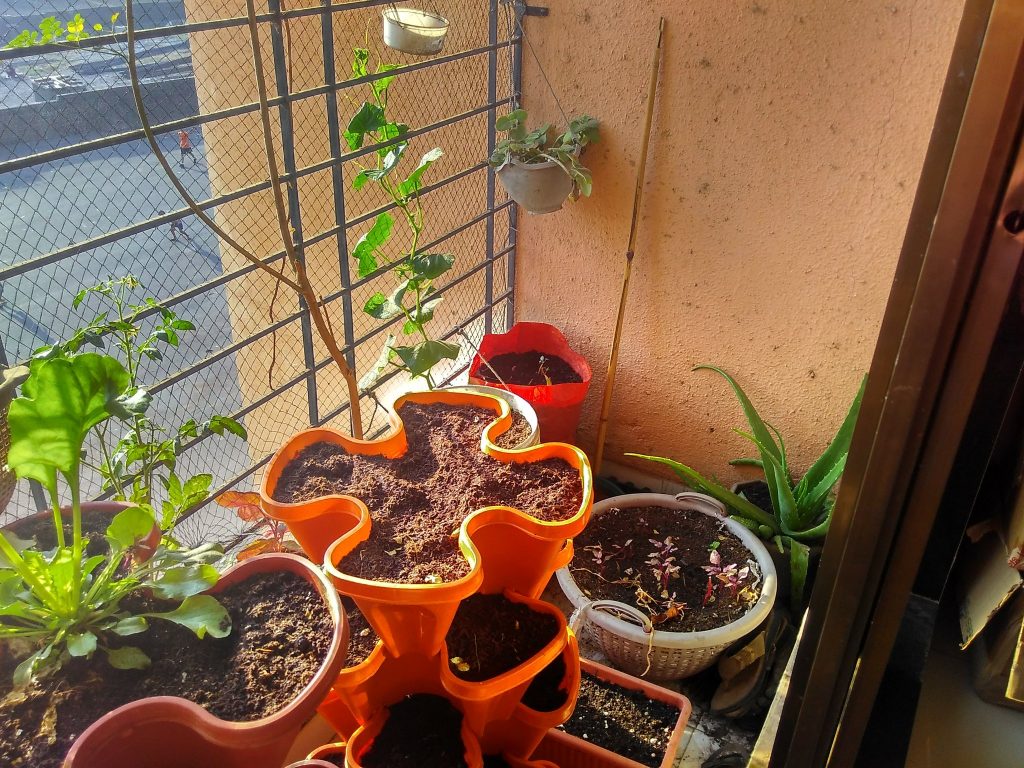
If horizontal space is limited, don’t just think of how much you can put on the floor. Look up the walls, up grills. Think vertical. There are many possibilities. This photo below shows three different vertical systems on just one wall.

vertical garden varieties

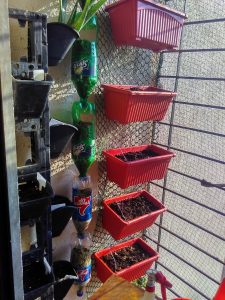
Here are three different ways I’m growing vertically on just one wall of my balcony

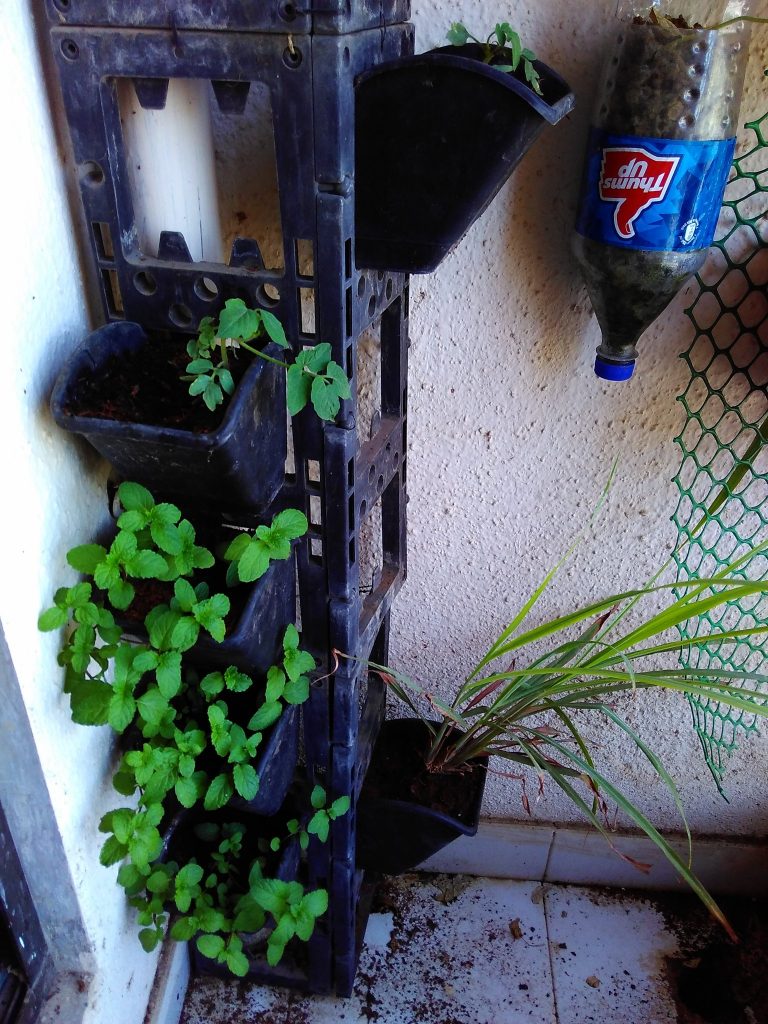
The first is a modular system you can buy. The pots can be put on the frame and taken off easily and I keep changing them depending on what needs the growing room.  I’ve put two sets of these panels perpendicular to each other to conceal a drainage pipe going thrrough the balcony. You can see that more clearly in this photo.

Mint growing in a vertical planter

Mint growing in a vertical planter

The three pots on the bottom left are the result of a little half bottle with some sprigs of mint stuck in. Once they needed more room, I gave them more room. If some day I decide I don’t need so much mint, I’ll take out a pot or two or if I need more, I might move the whole thing to a larger tub to spread out and grow. On the right is lemongrass. Now here’s the thing. Above the lemongrass and mint are tomato seedlings! They have outgrown their seedling trays and are perfect for using this size of pot for a while before being planted into something more permanent.

Improvised vertical gardens

The second is a vertical system made of old 2 liter cold drink bottles. Selling them won’t get any money and even recycling wastes resources to transport and process. Why not use them right here at home?

So, a vertical planter doesn’t have to be this premediated, permanent thing that you plant and maintain for a long time. You can use it as an intrmediate pot for a plant growing its way to a larger pot too. Next month, those pots will have something else in them.

Vertical garden from scraps of tarpaulin like cloth pieces

Vertical garden from scraps of tarpaulin like cloth pieces

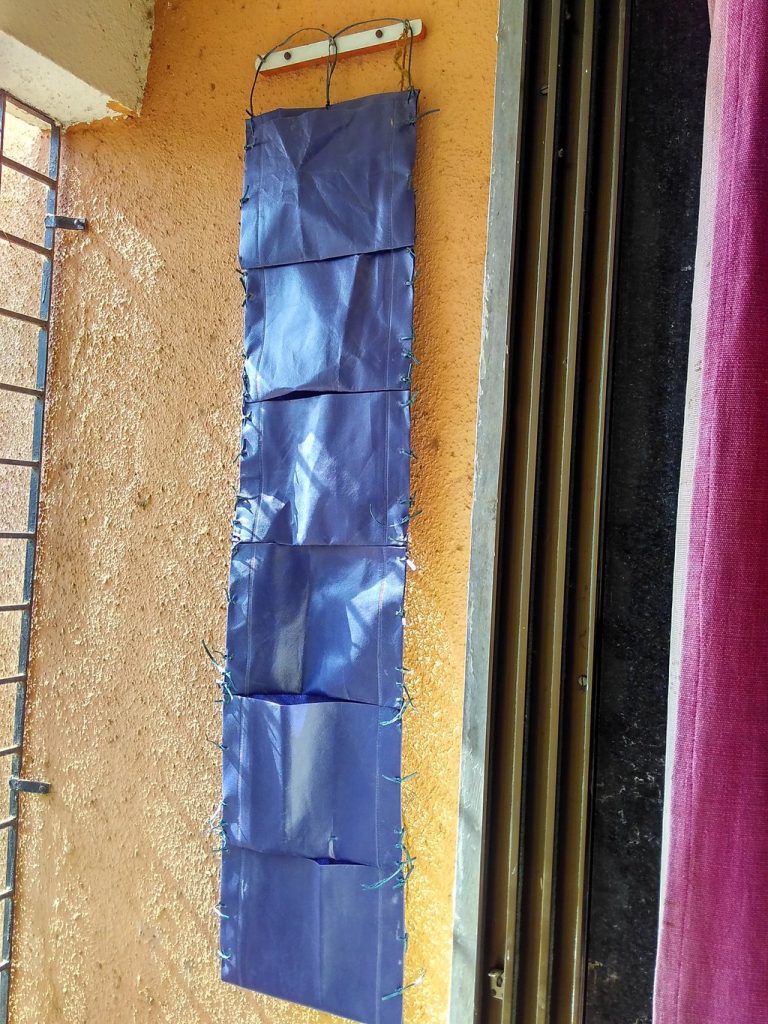
It doesn’t even have to be proper materials. I put this together by tying/stitching up some tarpaulin sheet like material pieces with plastic string. It didn’t last long. Once the plants growing in it were done, I had to trash it too.

Remixed vertical gardens?

The third in that top photo is a hard plastic net I’ve suspended down the wall. I hook any kind of a pot I wish onto it. Right now it is a set of rectangular planters. On another wall, I’ve suspended pots and entire trays for my carnivorous plants from hooks on the wall.

Growing carnivorous plants vertically

Growing carnivorous plants vertically

Sometimes you don’t have a wall to hang things on. So you can stack pots up.

Stacking pot sets

Stacking pot sets

These sets of stackable plant containers are found commercially for purchase, but you can really stack anything as long as it will stay stacked.

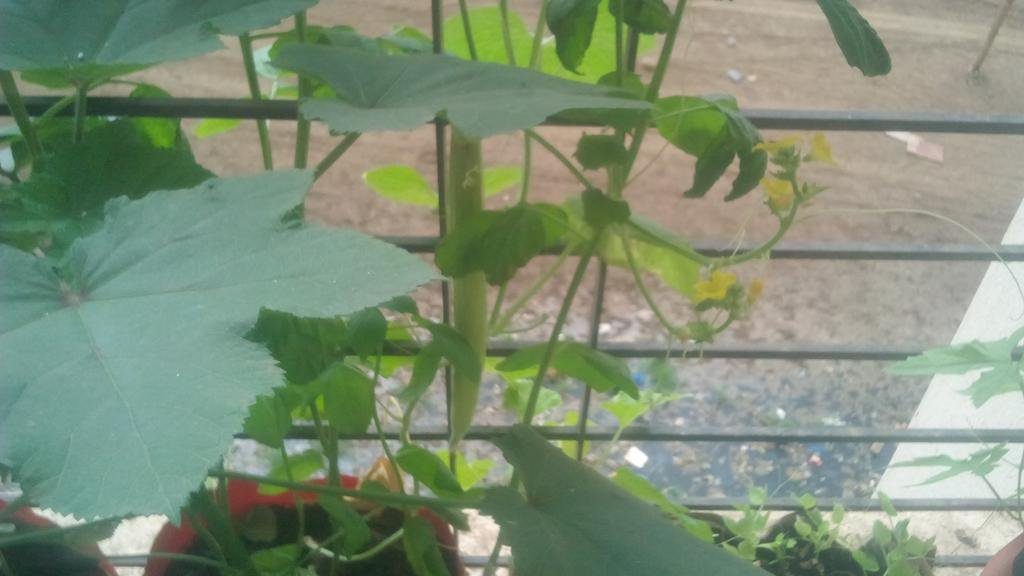
And of course, you can just send cucumbers and other vining plants up the grill…

Using the balcony grill as trellis for cucumber and bitter gourd

Using the balcony grill as trellis for cucumber and bitter gourd

This has the added advantage of screening the windows from direct sunlight and helping keep the home cooler in summer.

If I planted all this in pots spread on the floor, I wouldn’t have room to grow anything else! But this balcony faces east and the wall gets great light all morning and is bright all day. So why not…

Container sizes matter

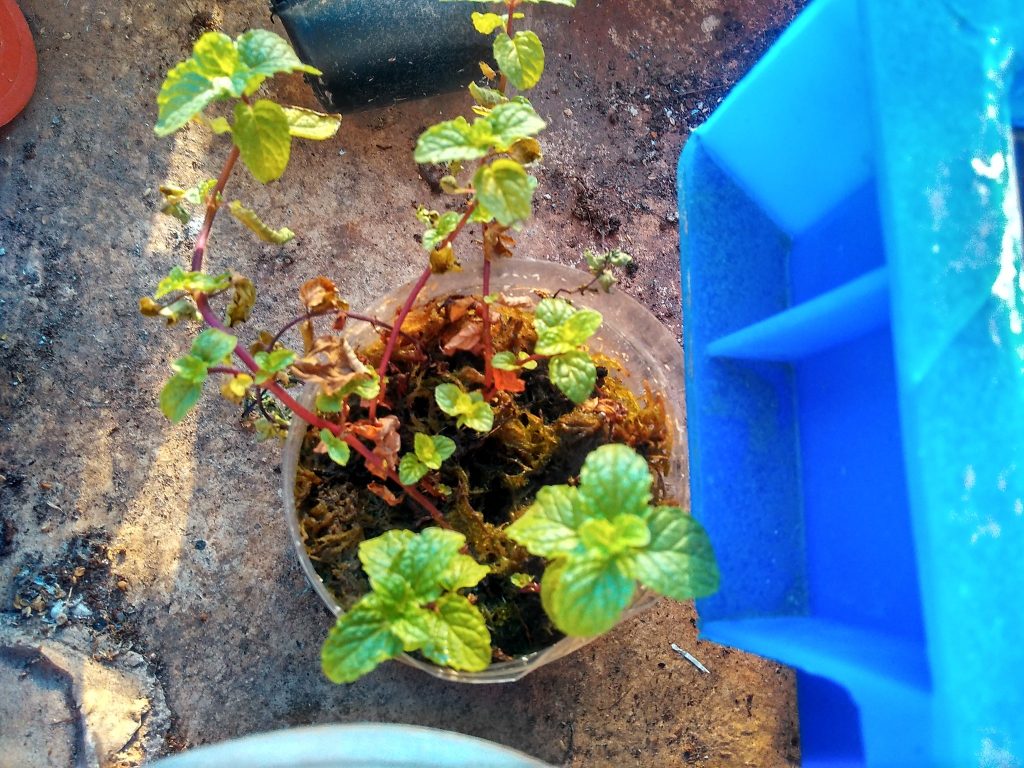
mint cuttings rooting sphagnum moss

I’ve started these mint cuttings in some sphagnum moss in a bottle cut in half.

In the photo above, I’ve cut a half liter mineral water bottle to make a cup (it was cracked). I put some sphagnum moss into it and stuck some sprigs of mint I’d got from the market. They rooted. I gave several of them around and planted these remaining ones, pinching them back and taking further cuttings from those that grew long till they filled the three bottom containers in the photo with the black vertical garden pots.

Plants grow best when their roots have adequate space. However, when you don’t have a lot of space, it can get tricky to provide plants all the space they need. I have found that this is possible to manage with careful timing and a little extra effort by potting up plants as they grow instead of directly planting them in large pots. This works very well with plants like tomatoes and capsicum, less well with fast growing plants like cucumber. Keeping the smaller pots off the floor allows me to use the space on the floor for the big containers for cucumbers, tomatoes, sweetcorn, okra

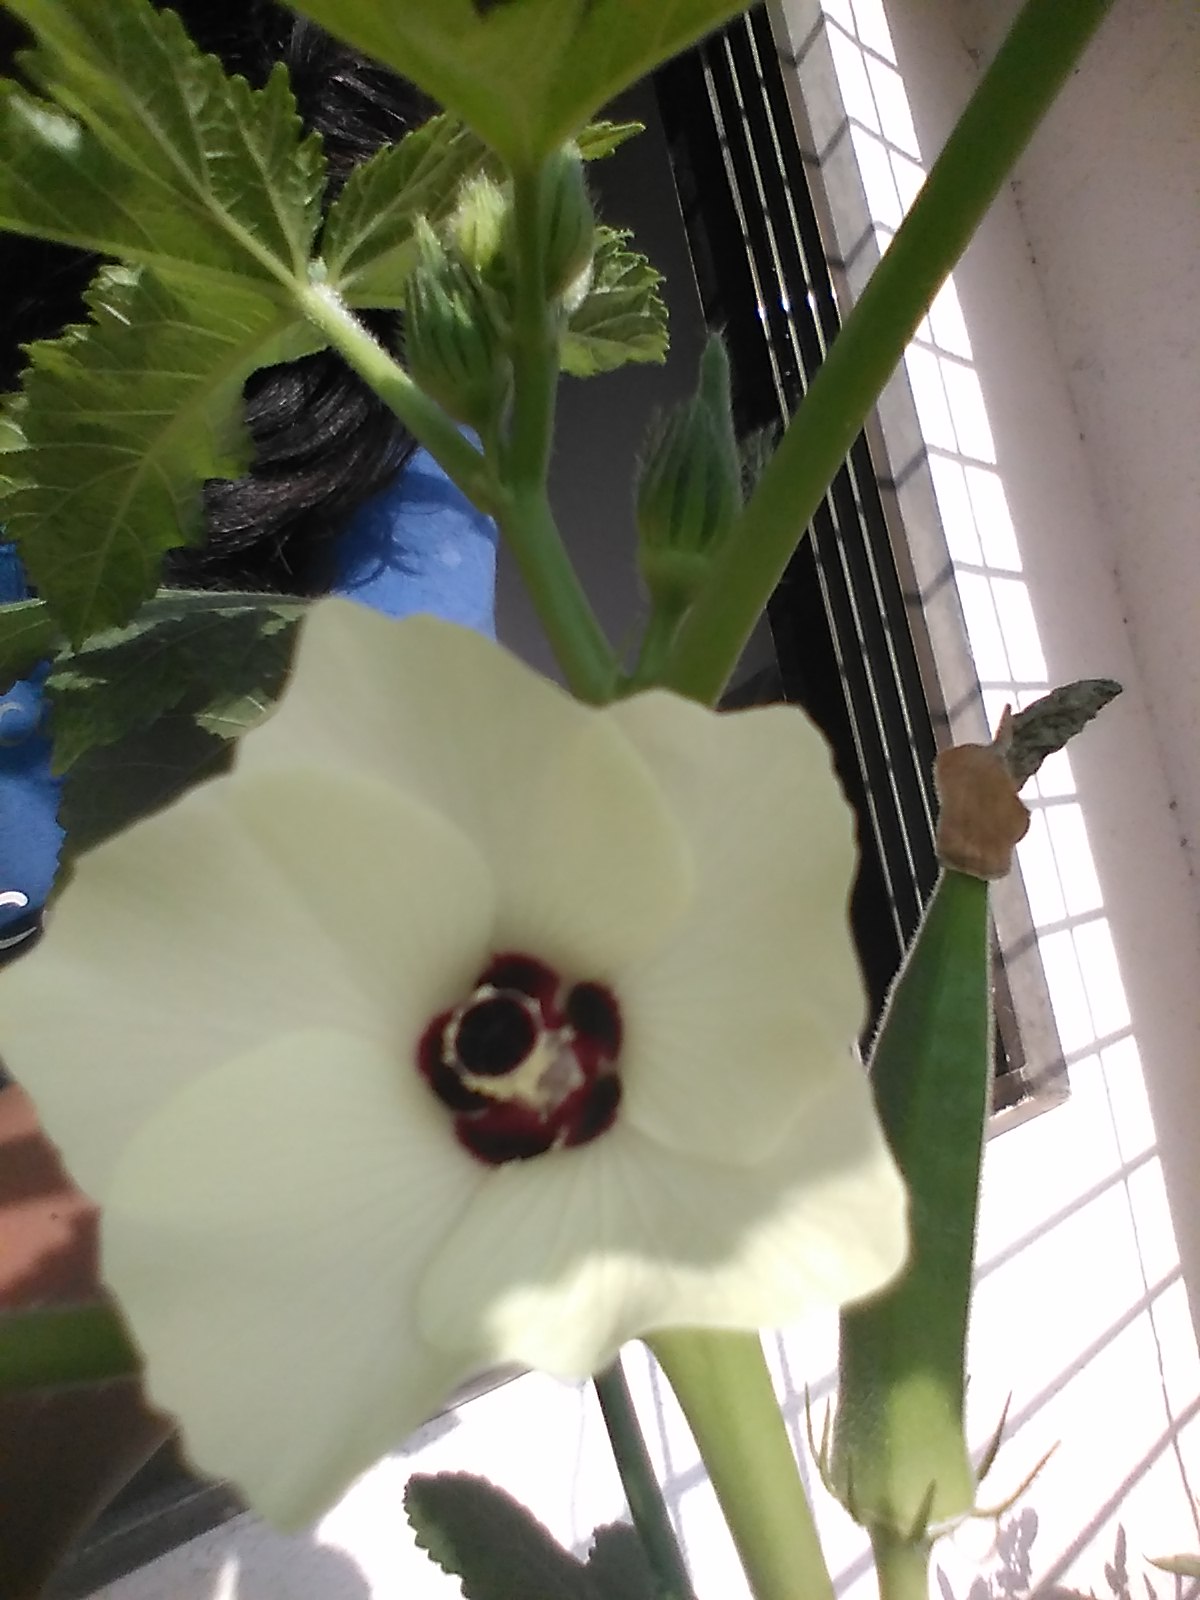
Okra flower and pod

image

ladiesfinger or bhindi or okra flower and pod

Now the okra planted in my balcony has started flowering and producing pods as well. This is very good.

Let my experience be a lesson. Never plant fewer than a dozen plants when you grow bhindi by whatever name. Also known as ladiesfinger and okra.

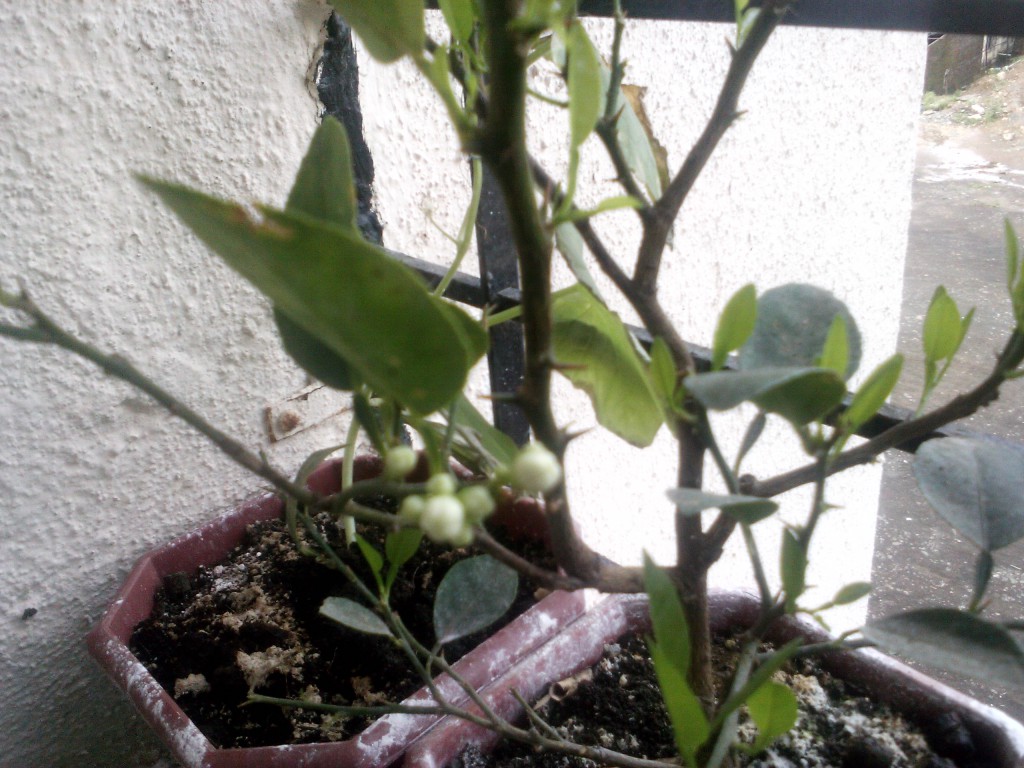
Small potted lemon tree flowering

First flowers in my balcony

The rewards of my labour of love. The lemon tree and rajma are flowering.

Small potted lemon tree flowering

Small potted lemon tree flowering

If you go really close, there buds have a wonderful citrus fragrance. Can’t wait for them to flower so that the scent can waft through the home with the breeze.

The lemon plant had been doing rather poorly on arrival. It arrived in good shape, but lost the lemon it had growing in travel. Then it started losing leaves. Then there was trouble with root rot. All through this time and till I had all that sorted, the leaves were dropping steadily till only a dozen or two remained. Frankly, I’d given up on the plant surviving, when it suddenly shed almost all its remaining leaves over a day or two and rapidly started putting out new foliage and buds. The new leaves are almost the size of the old ones now, and there are ten or so buds showing. Amazing.

The rajma is flowering as well. It has been growing so well, that it is on my “grow again” list as soon as I’m done with the plants I have started now.

Container grown rajma flowering

Container grown rajma flowering

Given the trouble I had with inadequate drainage and fungal gnats, I’m quite astonished that these two plants are doing so well. I’d thought I’d got an evil black thumb.

The brahmi plant has one small purple flower as well, but it is sort of underneath the leaves, and I’m trying to figure out how to get a good photo. I’m not particularly interested in the Brahmi flowering for now, as I was hoping to eat the leaves and I’m not sure how good the taste is when it flowers…

Maybe they are very forgiving..

The balcony garden strategy - more edible plants in small space 2

The balcony garden strategy – more edible plants in small space

So I now have a strategy for maximizing the use of space in my small balcony garden in order to get the most crops.

Beginning from having no plants….

Sow some quick gratification

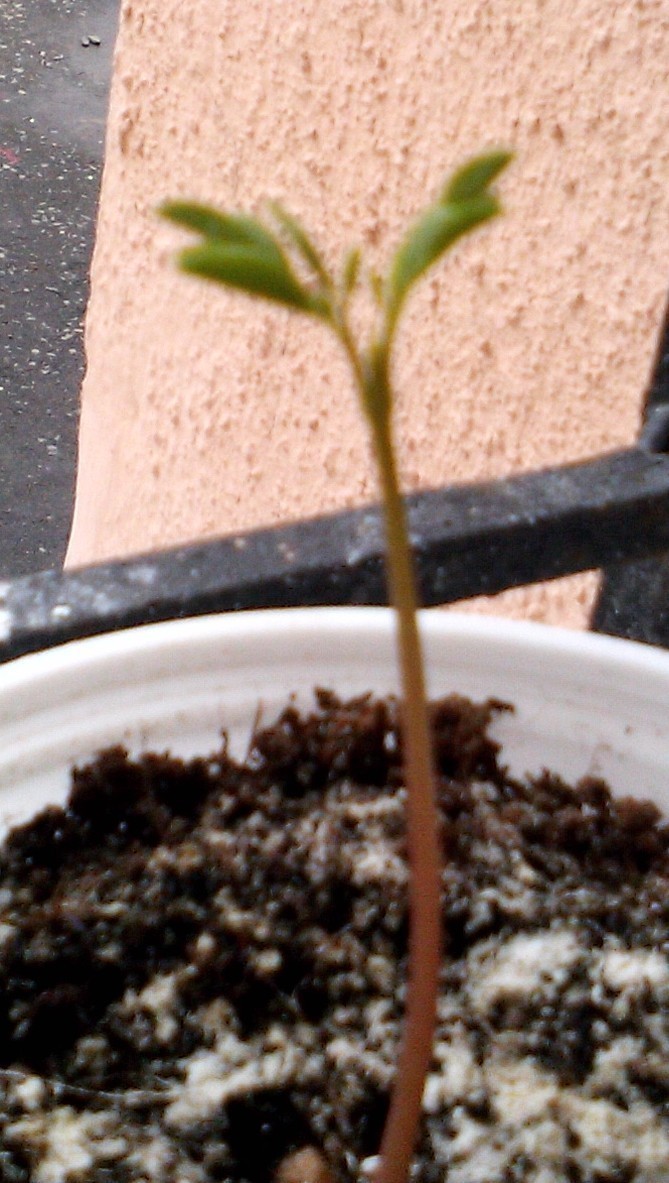
drumstick seedling moringa

Drumstick seedling at two days old

Every new gardener is excitedly awaiting results and plants will grow at the speed they will, but why not plant some early rewards while you go about learning to create your edible garden? Planting lettuce, carrots and drumsticks will give you some harvest very fast. Lettuce can be picked in small amounts within a couple of weeks. Even more so if you choose an early variety. Carrots can simply be pulled up earlier if you get desperate to see some result and they will taste tender and refreshing even if not at expected size. Drumstick trees grow so fast that if you grow them in a container, expect to be pruning them routinely to keep them from heading for the sky. This means a lot of edible, highly nutritious leaves that can be cooked like spinach. Mustard and fenugreek also come up fast and can be sown for greens.

Or hunt for more ideas. I like the thought of working hard to get a basic garden established in a couple of weeks and being able to watch it daily and be able to occasionally harvest something while you wait for your bigger crops to come to fruit.

Watering

DON’T WATER TOO MUCH. It will cause more problems than it will help. Young seedlings need very little water. By the time they grow, you’ll have learned to recognize when they need water. Your container should have plenty of holes in the bottom – you should be able to pour water in and see it come out from the bottom. A common mistake of the new gardener is to imagine that the container must hold water. IT MUST NOT. You water a plant to soak the soil.

Excess water will harm your plant and starve roots of oxygen and rot its roots and create problems with fungus gnats. GUARANTEED. Aim to water once a week at best. You don’t need to water at all till you see soil drying in the container. For seedlings, it is trickier. They must not be allowed to dry out, so you can water at the first sign of drying on the top. Larger pots with plants can be watered when you can poke your finger in to the second knuckle and the soil is dry. Soak well till water drains from the bottom and ignore till it is dry again – however long that is. This varies. With some plants you’ll need to water often, others will seem fine for ages. Generally, more sunlight, larger plant, more holes in container, dry or desert climate and water loving plants like tomato or cucumber will be factors needing more frequent watering.  Even daily or twice a day. Particularly once the fruit is set. A shady balcony without too much wind and a newly started garden will be fine for a week at least without watering.

I repeat DO NOT WATER MORE THAN YOUR PLANT NEEDS. The objective is not to fill the container with water, but to moisten the soil.

Selecting containers

I began with very small containers, imagining that I would pot up as the plants grew. It seems a bit instinctive for someone who wants to grow a lot in a small space, but I have fast learned that even for small spaces, large containers are better. Get the largest that make sense for the space. It is better to grow multiple crops in one pot than have many small pots – plants thrive better. Also what most people (read “me”) don’t realize easily is that the balcony space is limited in terms of area, not height, so one large container instead of three small ones gives you more depth and continuous volume of soil without taking up more floor space.

What to do with the small pots you instinctively hoarded? Use them to start seedlings and grow herbs and lettuce and other things that aren’t fussy.

Direct seeding vegetables go into a container first

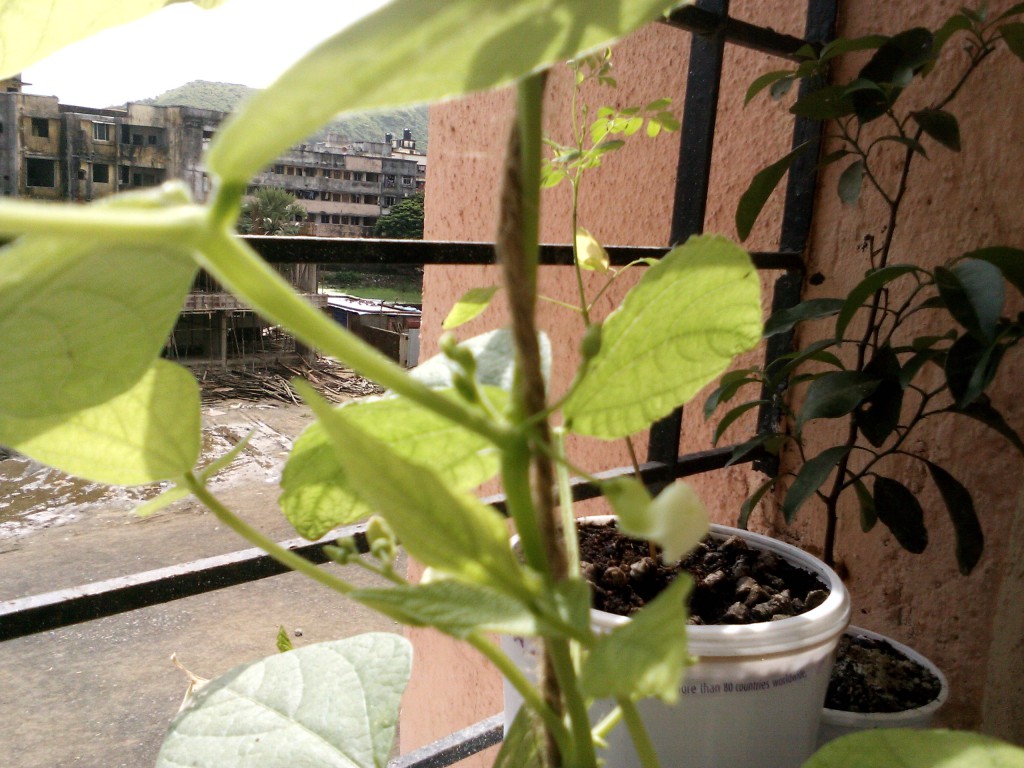
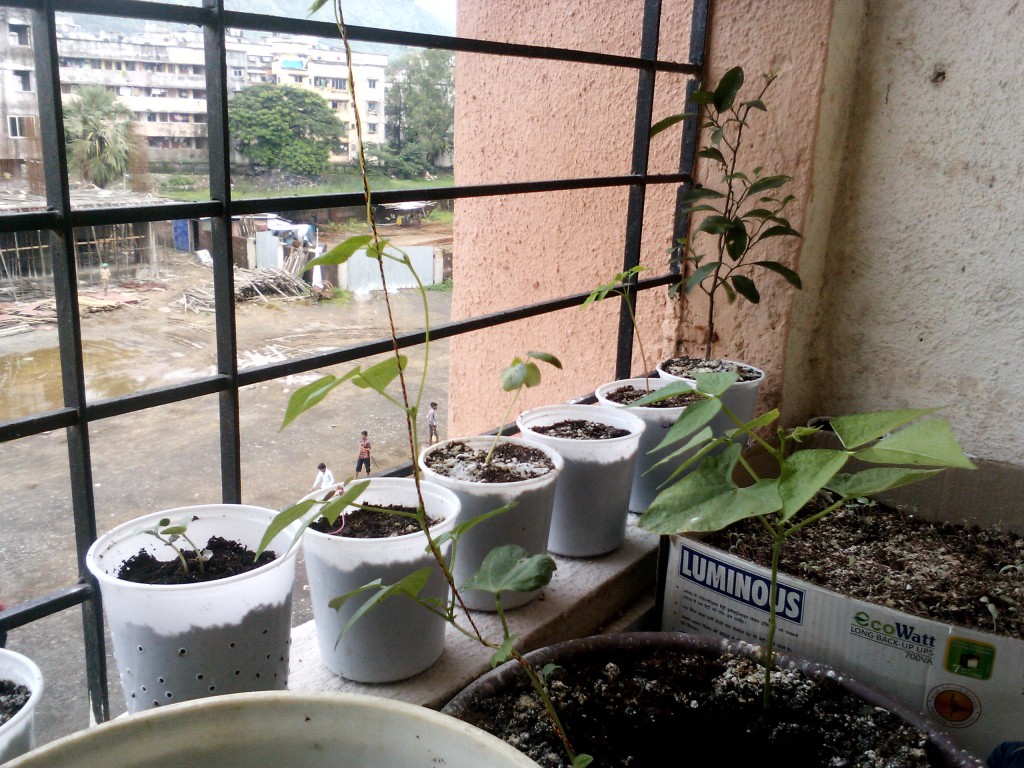
seedlings plants beans orange okra small space container gardening

seedlings and plants in balcony container garden

This means that you start your carrots, turnips, raddishes, beans, peas and more in some of the biggest pots you have, while your seedlings grow. I have learned from experience that seedlings grow nowhere near as fast as it seems in “how to grow container vegetables” information found on the internet. From putting the seed into the soil to being ready for transplant, it can take from a month or even two if your small containers are generous enough. Keep a few large containers free for seedlings that are ready fast. By the time your seedlings are ready for more pots, your early vegetables (baby carrots and lettuce in particular) will have vacated their spaces, ready for you to plant your seedlings.

Start seeds in small containers

Seeds and seedlings don’t need much space, and no matter how much you love them, they will be happy enough (indeed at less risk of overwatering) in small containers. I often pick up used disposable plastic tea cups outside tea stalls. I have used empty eggshells as well.

Start the seeds, and once they start showing true leaves (this can be a couple of weeks), plant them into individual small containers so that they don’t grow up tangling their roots with their neighbours and remain easy to transplant.

If you plan this well, a square foot of space can contain all the seeds you are planning to plant in your balcony (and some to spare). Line up the small seedling pots along window sills or poke holes under their rims and hang them from somewhere suitable to save space if needed.

Plan your large containers

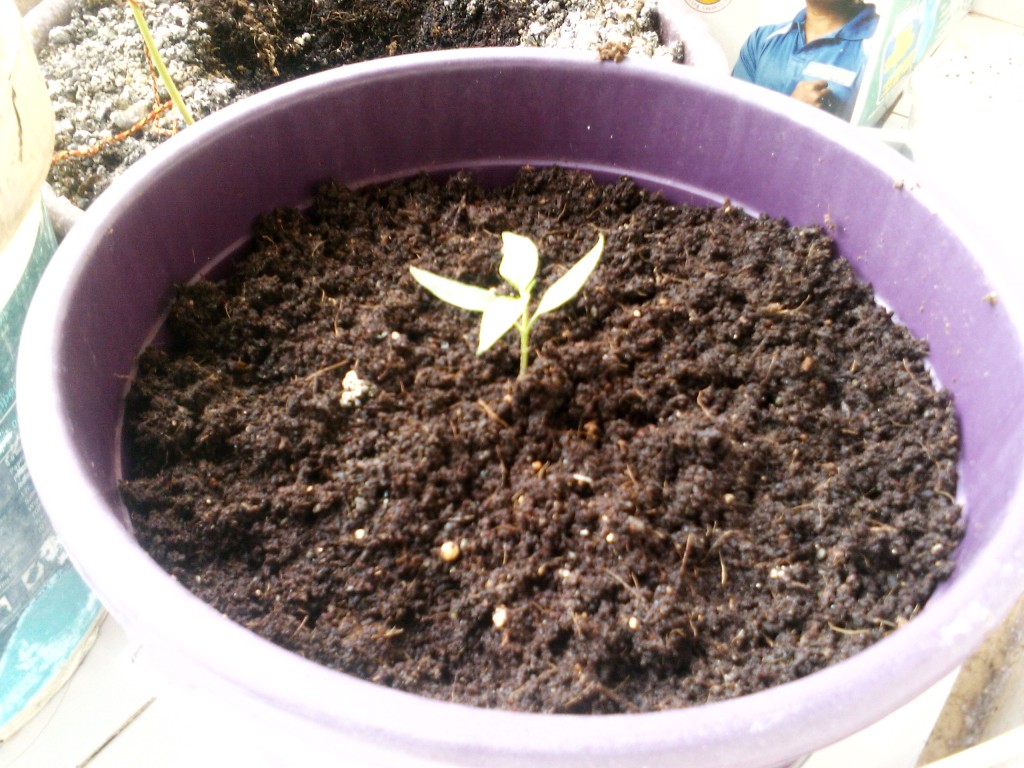
Chilly seedling in bucket with small and early Little Finger carrot seeds sown around it.

Chilly seedling in bucket with small and early Little Finger carrot seeds sown around it.

As your seedlings come up, it is time to plan your large containers to use space the best. A big bucket will hold one tomato plant, but you can easily plant basil or mint around it. Once your peas have come up a bit, plant your spinach or lettuce around them. Train your cucumbers and beans to climb up the grill or lean a stick against the wall to keep them off the ground (not just saving space, but less risk of disease and better shape). Beans and tomatoes work well in one container too. As long as I watch the plants well and make sure they have plenty of water, they don’t seem to mind the slight crowding so far. I will update as the season progresses.

One smaller bucket has peppers in the middle surrounded by “Little Finger” carrots.

Arrange plants to maximize sunlight

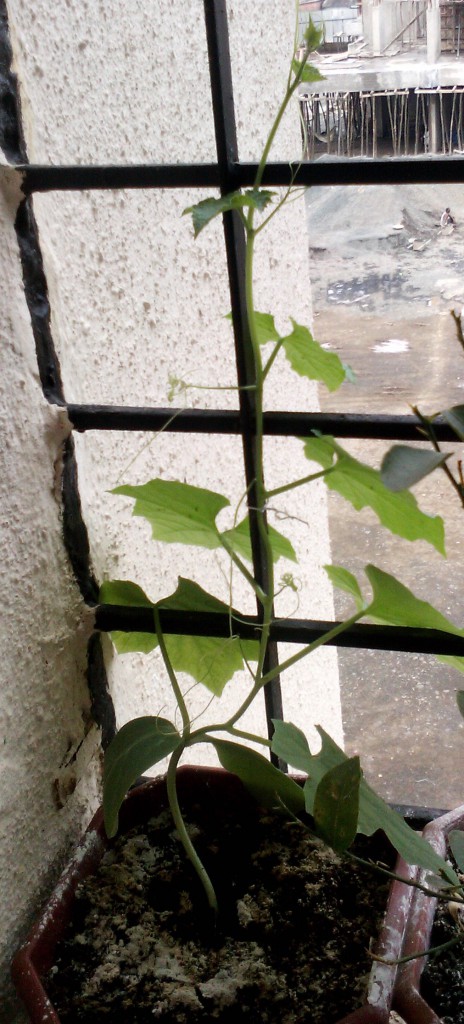
Gourd vine climbing up from a corner of the balcony grill

Gourd vine climbing up from a corner of the balcony grill

If you are planting in a balcony, at best you’ll have sunlight for part of the day. Arrange your containers so that plants get the most sunlight possible. I use hanging containers along the grill of the balcony so that the space is vertically used.

Relocate the greens to under larger plants

Once your seedlings are ready to transplant, plant greens around them. so that the pots you planted greens in earlier can be freed for more seedlings as they become ready. Mint, catnip, garlic and more can repel pests from plants and help protect them as well.

Use vertical spaces

It may mean simply hanging containers from the walls or ceilings to grab the light available in those spaces or it can mean elaborate designs for form or function, but just remember, for the space starved gardener, one direction to expand in is “up”.

This is it, I guess. My plan for starting container gardens in balconies. Hopefully if I ever need to do this again, I’ll be able to read this and not repeat mistakes 😀

5 steps to get rid of fungus gnats 3

5 steps to get rid of fungus gnats

As I learned the hard way, compost can sometimes go horribly wrong and bring guests to your plants you never wanted to see. If you’ve reached here reeling in horror after seeing your precious potted plant wilting even as maggots crawl in its soil, it is not so difficult to fix this.

Stop watering the plant infected by fungus gnat larvae

You want the top layer to dry out. Fungus gnat larvae are delicate for all the havoc they wreak and die easily in dry soil. The maggots complete their life cycle outside the soil, as the fungus gnats. Dry soil does not appear to be a good place to lay eggs to the adults. Don’t worry, a few days without water ewon’t kill your plant. This will prevent more eggs from being deposited, and prepare your container for the next step.

Water with diluted hydrogen peroxide

A week after you have stopped watering your plants (or less, if your soil goes dry before that – but not just looks dry, actually feels dry at least a 4-5 inches in), dilute hydrogen peroxide with three times the quantity in water. So for a cup of hydrogen peroxide, you want three cups of water. Use this to water your now dry container plant. The hydrogen peroxide will fizzle and degrade into oxygen and water – both of them not harmful to your plant, but will kill the maggots on contact.

Repeat the above two steps

Repeat the above two steps till you no longer find maggots. You can also test for the maggots by putting half a potato face down in the container (no need to bury). If there are maggots, you’ll find them at the potato in a few hours. Dispose of the potato and repeat the above two steps. If you don’t find the lrvae, you are home free.

Add gravel or sand as a top layer in your container.

Add a layer of gravel or sand on top of your potting soil/mix to prevent the gnats from seeing the container as a suitable breeding ground to begin with. Also be sure to replace the (removed) gravel or sand after adding compost or fertilizer to make sure the compost doesn’t attract flies.

Use fly traps

Trap fungus gnats with some yellow sticky paper or bowl with apple cider vinegar or any other fly trap to prevent infections. Catching houseflies too will prevent their infestations.

Call it a lesson learned – Avoid bone meal or some other fertilizers

Some fertilizers attract flies more than others. If after exposing it to air, you have a buzz of interested flies instantly, last thing you want is to put it in your container. Bone meal in particular seems to attract flies a lot.

This should be it.

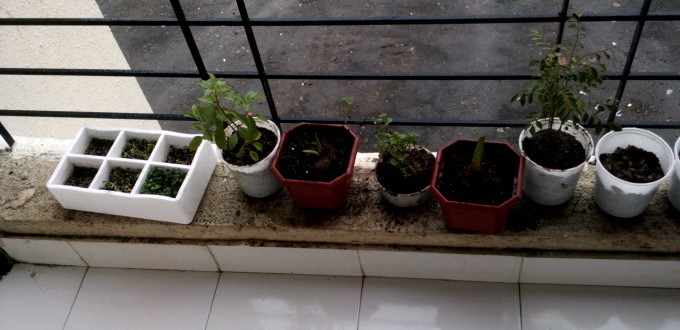
Starting my window ledge garden 4

Starting my window ledge garden

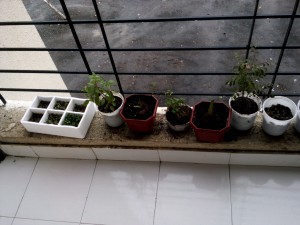
Second day in this home, the first day waking up here and the amazing energy to do something beautiful continues, so today, I spent some time planting the beginnings of my window ledge garden.

I got some seedlings, seeds, pots and lots of old home delivery plastic boxes I’d been saving. Nisarga is in diapers still, so I decided to use some ideas from some wise people and mixed in the inside of his used diapers (pee only) with the potting soil, which is a mix of some commercial soil that came with some seeds I had purchased, river sand, from this construction outside my window (conveniently drenched by pure rainwater), and vermicompost.

This big ugly construction site that my son adores because of the JCB moving sand.


building construction site in India

Building construction outside my window

There was not much rocket science to it other than wetting the diapers thoroughly t-h-o-r-o-u-g-h-ly till they became a sort of slurry, then mixing in the rest till it resembled wet soil. The seeds I planted into this, the seedlings I put in with the original mud block they came with and surrounded with this.

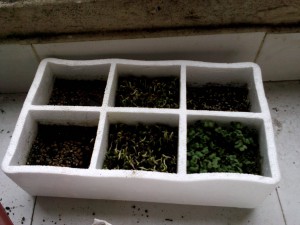
I repurposed the packing of a set of six cups which had nice compartments to seed a small segmented pot of greens. Coriander, fenugreek and mustard – in two compartments each – for now. Realized too late that the coriander should have been spinach, and a separate bowl for the coriander, since it would be used longer. Oh well, next time.

six compartment planter

Six compartment planter for greens repurposed from packaging of a set of mugs

No point getting into the details of it, but this is what the effort looked like by the time I washed my hands.

Window ledge garden